

How does NASA organize their parties? They planet. HA HA HA. In our house, we are all about puns, play on words, dad jokes, etc…the cheesier the better. My husband and I try to outdo each other with bad pun memes all the time. It’s the little things that keep our marriage strong. Now our four-year-old has started telling jokes and she has definitely been blessed with the cheesy joke gene. We couldn’t be prouder!
One day while I was hashtagging away on an Instagram post, I found #happyhooker and it tickled my funny bone WAY more than it probably should have. I really do have the sense of humor of a 13-year-old at times. What can I say, I’m a big kid.
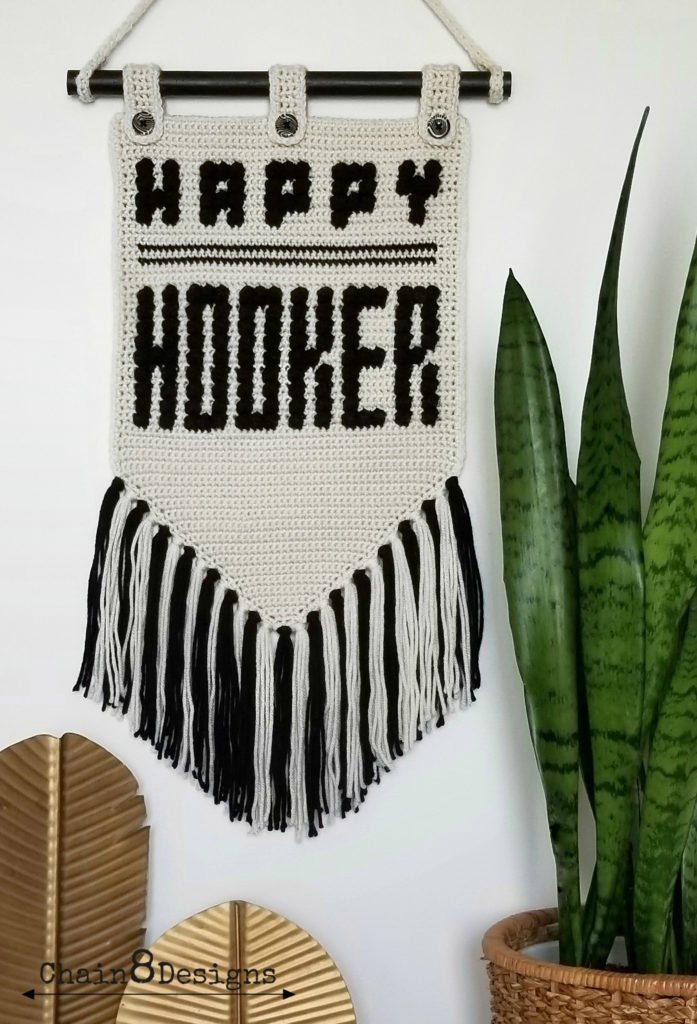
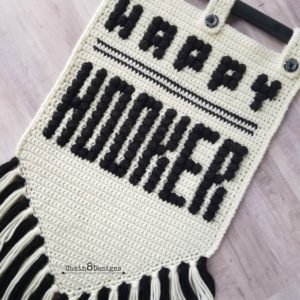
I’ve been redoing my office and I still had a blank wall to fill and knew I wanted something crochet to fill it. I thought of a few different ideas but nothing was really speaking to me until I remembered #happyhooker and knew that I wanted to make a wall hanging out of it. I know this won’t be everyone’s cup of tea, but if you like a good play on words this will be right up your alley.
Want to see what I’m up to and any upcoming projects? Follow along on Instagram @ Chain 8 Designs.
![]()
DISCLAIMER: This post may contain affiliate links. I receive a small percentage from any purchases you may make (at no cost to you).
HAPPY HOOKER WALL HANGING
ABBREVIATIONS:
CH = Chain
SC = Single Crochet
BO = Bobble Stitch
SSCF = Seamless Single Crochet Finish
MATERIALS NEEDED:
Size H Hook (5 mm)
1 Skein Premier Everyday Yarn in Cream
1 Skein Premier Everyday Yarn in Black
15″ x 20″ Black Felt
3/4″ Dowel (Cut to 14″)
3 – 3/4″ Buttons
Glue Gun and Glue
Black Spray Paint
Fabric Scissors
Yarn Needle
Metal Yardstick
Rotary Cutter and Mat
Fabric Chalk (optional if you have a rotary cutter and mat)
Blocking Mats (optional)
Blocking Pins (optional)
![]()
WALL HANGING
Notes:
*[C] = Cream; [B] = Black
*Rows 1-31 are all worked with cream
*While changing colors, carry the yarn in the back but do NOT crochet over it.
*Bobbles will be a three double crochet bobble
CH 3
Row 1: 2 SC in 2nd CH from hook; 2 SC in next; CH 1; turn (4)
Row 2: 2 SC; SC next 2; 2 SC; CH 1; turn (6)
Row 3: 2 SC; SC next 4; 2 SC; CH 1; turn (8)
Row 4: 2 SC; SC next 6; 2 SC; CH 1; turn (10)
Row 5: 2 SC; SC next 8; 2 SC; CH 1; turn (12)
Row 6: 2 SC; SC next 10; 2 SC; CH 1; turn (14)
Row 7: 2 SC; SC next 12; 2 SC; CH 1; turn (16)
Row 8: 2 SC; SC next 14; 2 SC; CH 1; turn (18)
Row 9: 2 SC; SC next 16; 2 SC; CH 1; turn (20)
Row 10: 2 SC; SC next 18; 2 SC; CH 1; turn (22)
Row 11: 2 SC; SC next 20; 2 SC; CH 1; turn (24)
Row 12: 2 SC; SC next 22; 2 SC; CH 1; turn (26)
Row 13: 2 SC; SC next 24; 2 SC; CH 1; turn (28)
Row 14: 2 SC; SC next 26; 2 SC; CH 1; turn (30)
Row 15: 2 SC; SC next 28; 2 SC; CH 1; turn (32)
Row 16: 2 SC; SC next 30; 2 SC; CH 1; turn (34)
Row 17: 2 SC; SC next 32; 2 SC; CH 1; turn (36)
Row 18: 2 SC; SC next 34; 2 SC; CH 1; turn (38)
Row 19: 2 SC; SC next 36; 2 SC; CH 1; turn (40)
Row 20: 2 SC; SC next 38; 2 SC; CH 1; turn (42)
Row 21: 2 SC; SC next 40; 2 SC; CH 1; turn (44)
Row 22: 2 SC; SC next 42; 2 SC; CH 1; turn (46)
Row 23: 2 SC; SC next 44; 2 SC; CH 1; turn (48)
Row 24: 2 SC; SC next 46; 2 SC; CH 1; turn (50)
Row 25: 2 SC; SC next 48; 2 SC; CH 1; turn (52)
Row 26-31: SC all; CH 1; turn (52)
Row 32: [C] SC 3; [B] SC 2; [C] SC 2; [B] SC 2; [C] SC 2; [B] SC 6; [C] SC 2; [B] SC 2; [C] SC 2; [B] SC 2; [C] SC 2; [B] SC 6; [C] SC 2; [B] SC 6; [C] SC 2; [B] SC 2; [C] SC 2; [B] SC 2; [C] SC 3; CH 1; turn (52)
Row 33: [C] SC 3; [B] BO; SC; [C] SC 2; [B] BO; SC; [C] SC 2; [B] BO; SC; BO; SC; BO; SC; [C] SC 2; [B] BO; SC; BO; SC; BO; SC; [C] SC 2; [B] BO; SC; [C] SC 2; [B] BO; SC; [C] SC 2; [B] BO; SC; BO; SC; BO; SC; [C] SC 2; [B] BO; SC; [C] SC 2; [B] BO; SC; [C] SC 3; CH 1; turn (52)
Row 34: [C] SC 3; [B] SC 2; [C] SC 2; [B] SC 2; [C] SC 6; [B] SC 2; [C] SC 2; [B] SC 2; [C] SC 2; [B] SC 2; [C] SC 2; [B] SC 2; [C] SC 2; [B] SC 2; [C] SC 2; [B] SC 2; [C] SC 2; [B] SC 2; [C] SC 2; [B] SC 2; [C] SC 2; [B] SC 2; [C] SC 3; CH 1; turn (52)
Row 35: [C] SC 3; [B] BO; SC; [C] SC 2; [B] BO; SC; [C] SC 2; [B] BO; SC; [C] SC 2; [B] BO; SC; [C] SC 2; [B] BO; SC; [C] SC 2; [B] BO; SC; [C] SC 2; [B] BO; SC; [C] SC 2; [B] BO; SC; [C] SC 2; [B]BO; SC; [C] SC 6; [B] BO; SC; [C] SC 2; [B] BO; SC; [C] SC 3; CH 1; turn (52)
Row 36: Repeat Row 34 (52)
Row 37: Repeat Row 35 (52)
Row 38: Repeat Row 34 (52)
Row 39: Repeat Row 35 (52)
Row 40: [C] SC 5; [B] SC 4; [C] SC 2; [B] SC 6; [C] SC 4; [B] SC 4; [C] SC 2; [B] SC 2; [C] SC 2; [B] SC 2; [C] SC 2; [B] SC 2; [C] SC 2; [B] SC 2; [C] SC 2; [B] SC 6; [C] SC 3; CH 1; turn (52)
Row 41: [C] SC 3; [B] BO; SC; BO; SC; BO; SC; [C] SC 2; [B] BO; SC; [C] SC 2; [B] BO; SC; [C] SC 2; [B] BO; SC; [C] SC 2; [B] BO; SC; [C] SC 2; [B] BO; SC; BO; SC; [C] SC 4; [B] BO; SC; BO; SC; BO; SC; [C] SC 2; [B] BO; SC; BO; SC; [C] SC 5; CH 1; turn (52)
Row 42: Repeat Row 34 (52)
Row 43: Repeat Row 35 (52)
Row 44: Repeat Row 34 (52)
Row 45: Repeat Row 35 (52)
Row 46: Repeat Row 34 (52)
Row 47: Repeat Row 35 (52)
Row 48: [C] SC 3; [B] SC 6; [C] SC 2; [B] SC 6;[C] SC 2; [B] SC 2; [C] SC 2; [B] SC 2; [C] SC 2; [B] SC 6; [C] SC 2; [B] SC 6; [C] SC 2; [B] SC 2; [C] SC 2; [B] SC 2; [C] SC 3; CH 1; turn (52)
Row 49: [C] SC 3; [B] BO; SC; [C] SC 2; [B] BO; SC;[C] SC 2; [B] BO; SC; BO; SC; BO; SC; [C] SC 2; [B] BO; SC; BO; SC; BO; SC; [C] SC 2; [B] BO; SC; [C] SC 2; [B] BO; SC; [C] SC 2; [B] BO; SC, BO; SC; BO; SC; [C] SC 2; [B] BO; SC; BO; SC; BO; SC; [C] SC 3; CH 1; turn
Row 50-52: [C] SC all; CH 1; turn (52)
Row 53: [C] SC 3; [B] SC 46; [C] SC 3; CH 1; turn (52)
Row 54: [C] SC all; CH 1; turn (52)
Row 55: Repeat Row 53 (52)
Row 56-58: [C] SC all; CH 1; turn (52)
Row 59: [C] SC 5; [B] SC 2; [C] SC 10; [B] SC 2; [C] SC 8; [B] SC 2; [C] SC 4; [B] SC 2; [C] SC 2; [B] SC 2; [C] SC 4; [B] SC 2; [C] SC 2; [B] SC 2; [C] SC 3; CH 1; turn (52)
Row 60: [C] SC 3; [B] BO; SC; [C] SC 2; [B] BO; SC; [C] SC 4; [B] BO; SC; [C] SC 2; [B] BO; SC; [C] SC 4; [B] BO; SC; [C] SC 8; [B] BO; SC; [C] SC 10; [B] BO; SC; [C] SC 5; CH 1; turn (52)
Row 61: [C] SC 5; [B] SC 2; [C] SC 6; [B] SC 6; [C] SC 4; [B] SC 6; [C] SC 4; [B] SC 6; [C] SC 4; [B] SC 6; [C] SC 3; CH 1; turn (52)
Row 62: [C] SC 3; [B] BO; SC; BO; SC; BO; SC; [C] SC 4; [B] BO; SC; BO; SC; BO; SC; [C] SC 4; [B] BO; SC; BO; SC; BO; SC; [C] SC 4; [B] BO; SC; BO; SC; BO; SC; [C] SC 6; [B] BO; SC; [C] SC 5; CH 1; turn (52)
Row 63: [C] SC 3; [B] SC 2; [C] SC 2; [B] SC 2; [C] SC 4; [B] SC 2; [C] SC 2; [B] SC 2; [C] SC 4; [B] SC 2; [C] SC 2; [B] SC 2; [C] SC 4; [B] SC 2; [C] SC 2; [B] SC 2; [C] SC 4; [B] SC 2; [C] SC 2; [B] SC 2; [C] SC 3; CH 1; turn (52)
Row 64: [C] SC 3; [B] BO; SC; [C] SC 2; [B] BO; SC; [C] SC 4; [B] BO; SC; [C] SC 2; [B]BO; SC; [C] SC 4; [B] BO; SC; [C] SC 2; [B] BO; SC; [C] SC 4; [B] BO; SC; [C] SC 2; [B] BO; SC; [C] SC 4; [B] BO; SC; [C] SC 2; [B] BO; SC; [C] SC 3; CH 1; turn (52)
Row 65: [C] SC 3; [B] SC 2; [C] SC 2; [B] SC 2; [C] SC 4; [B] SC 6; [C] SC 4; [B] SC 6; [C] SC 4; [B] SC 6; [C] SC 4; [B] SC 2; [C] SC 2; [B] SC 2; [C] SC 3; CH 1; turn (52)
Row 66: [C] SC 3; [B] BO; SC; [C] SC 2; [B] BO; SC; [C] SC 4; [B] BO; SC; BO; SC; BO; SC; [C] SC 4; [B] BO; SC; BO; SC; BO; SC; [C] SC 4; [B] BO; SC; BO; SC; BO; SC; [C] SC 4; [B] BO; SC; [C] SC 2; [B] BO; SC; [C] SC 3; CH 1; turn (52)
Row 67-72: [C] SC all; CH 1; turn (52)
Row 73: [C] SC 51; 2 SC in last (53)
Finishing: SC down the edge of the left hand side till you reach the two chains at the point (the chains you started you hanging with); SC into the first CH; CH 1; SC in next CH; continue single crocheting up the other side; end with SSCF into the first stitch of Row 73.
HANGER TABS (Make 3)
CH 4
Row 1: SC into 2nd CH from hook; SC next 2; CH 1; turn
Row 2-19: SC all; CH 1; turn
Row 20: SC next 2; 2 SC
Finishing: SC around the edge of the three remaining sides (making sure to put 2 SC in each corner) ending with a SSCF to first SC of Row 20
HANGER CHAIN
CH 61
Row 1: SC into 2nd CH from hook; SC next 59; CH 1; turn
Row 2: SC into the loop on the back; SC next 59; fasten off
ASSEMBLY
Blocking: [If the edges of your hanging look straight and even, you can skip this step.] I found that when I finished the wall hanging the shape had become a little wonky. To get things back into shape and the edges straight, I wet blocked it. There are many great tutorials online that can walk you through the blocking process.
Making felt backing: Lay the hanging on the piece of felt and carefully cut around the edge. It doesn’t need to be perfect; we will clean up the edge in the next step.

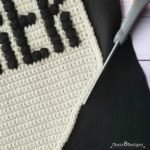
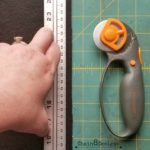
Because we need to clean up the edges and want the backing to be smaller than the actual hanging we will be trimming off a little felt from each side. This is where a lined cutting mat and rotary cutter come in handy. Lay the felt on the mat and using the lines on your board, trim off approx. 1/4″ to 1/2″ inches from each side. If you don’t have a mat and rotary cutter you can also mark the lines with fabric chalk and cut with scissors. Lay the backing onto the hanging to check that the fit is right and trim any excess. You want the backing to fit just inside the edge you created by the single crochet around the edge.
Attaching the felt backing: Run a bead of glue along the top edge of the felt and glue to the back of the hanging. Glue small sections on each side as you work to the bottom.

Attaching the tabs: Take each of your hanging tabs and fold them in half, finger creasing the fold. You should be able to easily tell where the crease (aka middle) is when you unfold them. This will help when you glue the tabs on the back. Hot glue the first tab in the very middle of the hanging and align the bottom edge with the second line (see pic). Glue the other two tabs just inside the outer edges. Fold the tabs at the creases and glue the tabs to the back.
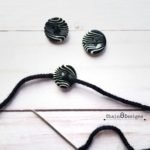
Making faux sewn buttons and attaching them: Make two crosses (to mimic actual sewn buttons stitches); tie a couple of knots in the back; cut excess yarn; glue buttons as shown in the picture.


Making and attaching the tassels: Cut 60 black and 54 cream, 15″ pieces of yarn. [TIP: To save time, cut both colors together.] Insert hook into the CH 1 space at the point of the hanging. Fold four black strings in half and pull through to form a loop. Make sure that the two sides of the tassel are even, insert tail ends through loop and pull taut. Skip the next single crochet and repeat the same process but with four cream-colored strands. Keep alternating between black and cream until done.
Once you have all the tassels done you will notice that they are not all even. I liked the look of the randomness but if you prefer a more even look, give them a good trim. Here is another spot where the rotary cutter and mat come in handy.


Making the dowel: Cut and spray paint your dowel black; insert the dowel through the tabs.
Attaching hanger: Glue down the tails left from making the hanger and snip off the excess. Wrap one end of the hanger approx. 1/2″ from the end of the dowel and glue the end to the back of the hanger. To keep the hanger from moving on the dowel, put a small amount of glue under the hanger to secure it to the dowel.


![]()
This wall hanging now resides in my office and makes me giggle a little each time I see it. I hope that you guys get as big a kick out of it as I have. I would love to see any versions of this that you make. Use the #chain8designs on Instagram. I really looooove seeing what others have made from my patterns; it makes me feel like a proud mama bear. I hope everyone has a fantastic rest of the summer. Till next time HAPPY HOOKING!

**Feel free to make and sell items that are made from my patterns. Please link back to the pattern on any online sales or include my web address on tags for any in-person sales. Please do not republish or distribute any of the pictures or patterns, in any form, from this site. If you would like to feature one of my patterns on your site please e-mail me at chain8designs@yahoo.com.**
WANT TO SEE SNEAK PEAKS OF UPCOMING PATTERNS AND PROJECTS OR GENERAL HOME DECOR/CROCHET/CRAFTING FUN?
Follow me on Instagram and also use #chain8designs: chain8designs
Facebook: Chain8Designs
Ravelry: Chain 8 Designs
Hi!! I am making my way through the pattern and I’m stuck on row 59/60. I am counting 54 stitches in the pattern for those rows instead of 52 and it’s completely throwing me. Is there maybe a typo or am I doing something wrong maybe? I looooove this pattern please help!! Tia!
I’m glad you love the pattern. 🙂 Yes, there was a typo and I have fixed it…sorry about that.