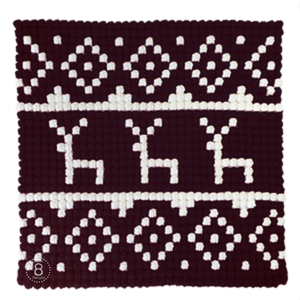
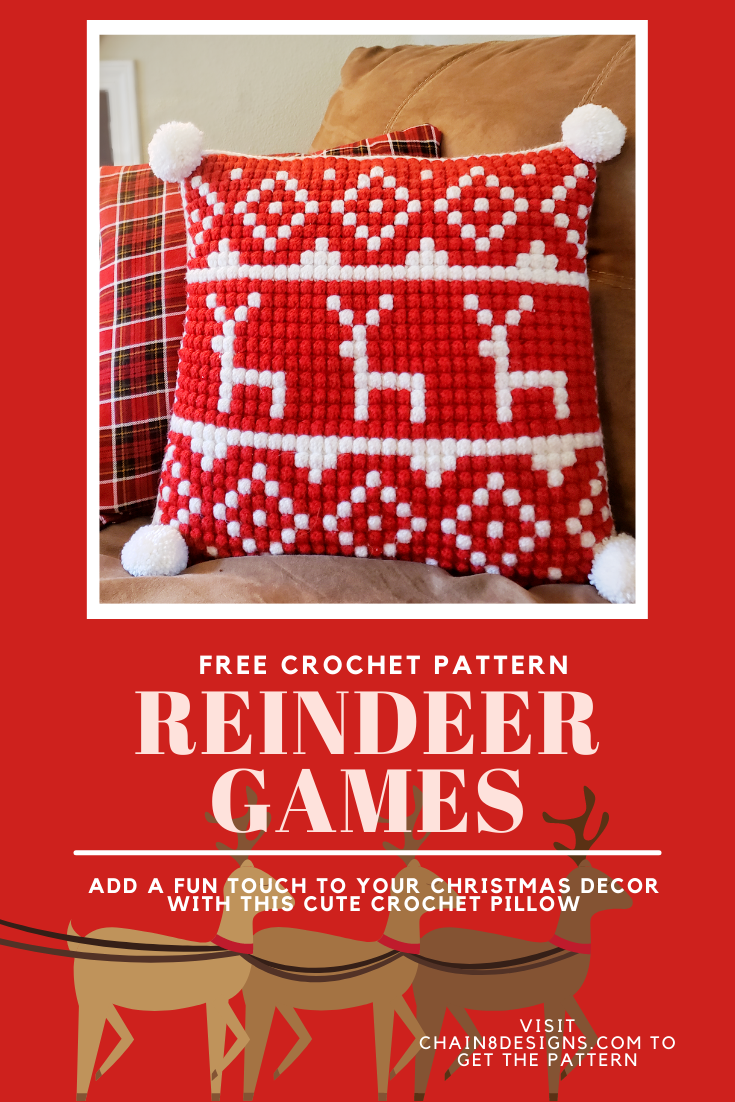
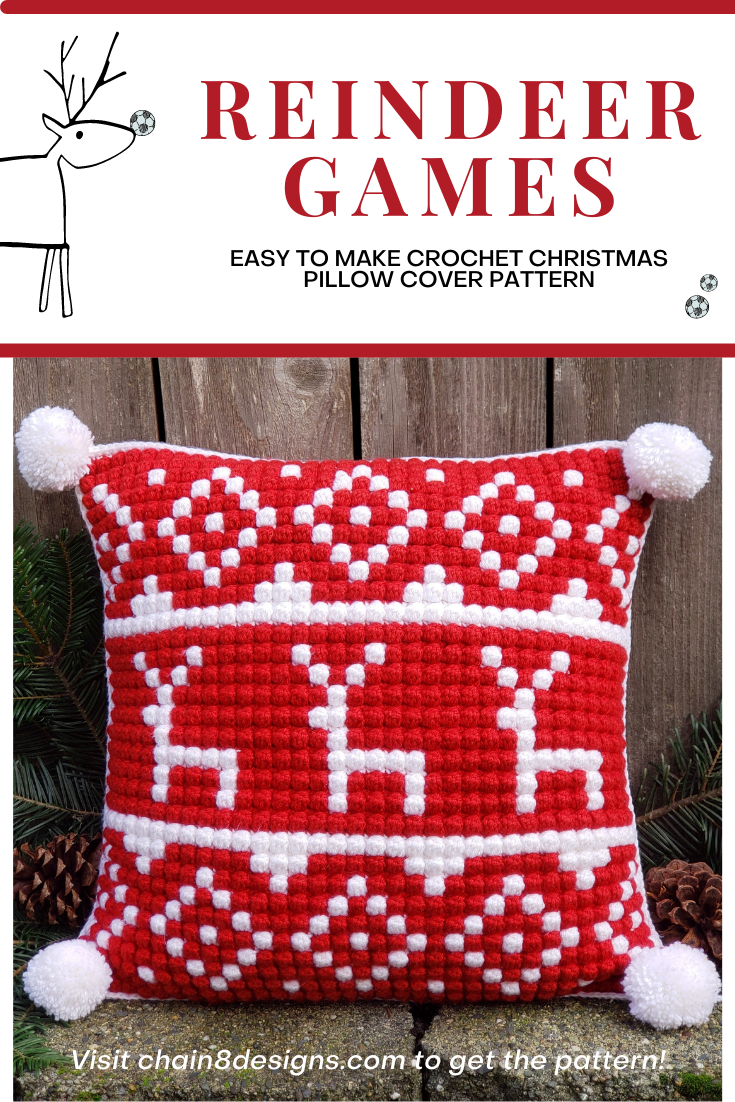
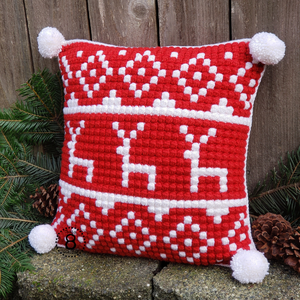
On the fourth day of Christmas, Chain 8 Designs gave to me, three frolicking dear, two yarn colors, and a pillow cover for my Christmas decor.
Now that Thanksgiving is in the books, it’s time to start decorating for CHRISTMAS!!!!! I love, love, LOVE decorating for Christmas! To be honest, I started decorating a couple of weeks ago, because I like to take my time, but now it’s all done and I’m in heaven! The house feels so cozy with all the lights and the smell of the tree. I actually made this pillow for Christmas last year (at the same time as its companion, the Reindeer Games Beanie), but I didn’t have time to have it tested so now I finally get a chance to share it with everyone! While I love the beanie, the pillow is my favorite. SHH don’t tell the hat! LOL I just really love making home decor the most.
The front cover is made with the bobble stitch and the back cover is made with single crochets. The ease of both stitches makes it a great project for someone who is newer to crochet. My favorite thing about this pillow is that it is a pillow cover. If you’re anything like me, you already have a ton of Christmas decorations to store, who has room to store a full pillow? I honestly make all my holiday pillows as covers. I’d have no room in my house if I had to store pillows for every holiday! Plus if you have little ones around, being able to easily clean anything is a huge bonus.
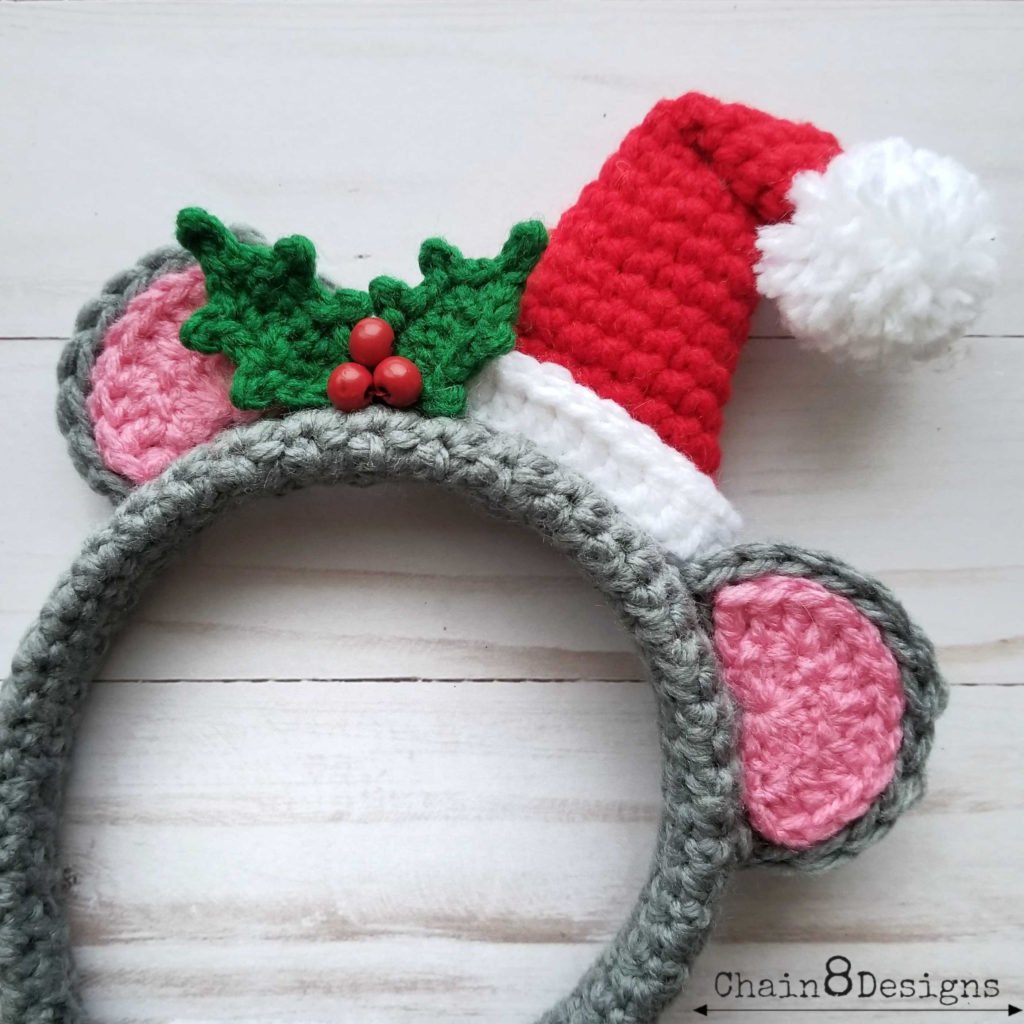
Reindeer Games Beanie
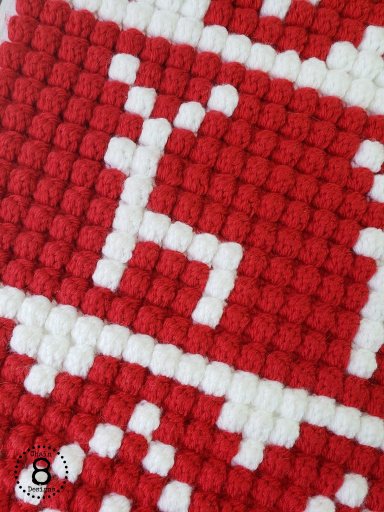
THE BOBBLE STITCH
If you have been here for a while, then you know my love for the bobble stitch. Seriously, I think I’ve forgotten that other stitches exist for making pillows because I love this stitch so much. The stitch has a fabulous nubby texture and while it can be a yarn eater, you can’t argue with the wonderful texture it gives. The stitch is super simple to make, as it is made with double and single crochets. If you have never worked with the bobble stitch before, I have a bobble stitch tutorial to teach you how.
The bobble stitches gives any project a great nubby texture that just can't be beat!
COLOR COMBOS
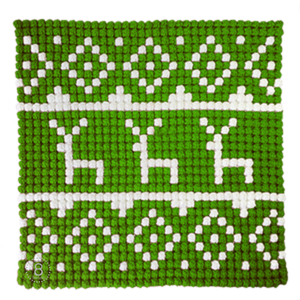
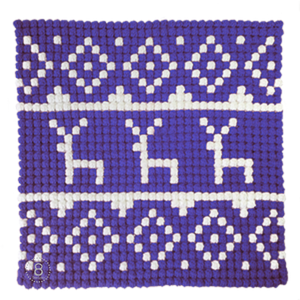
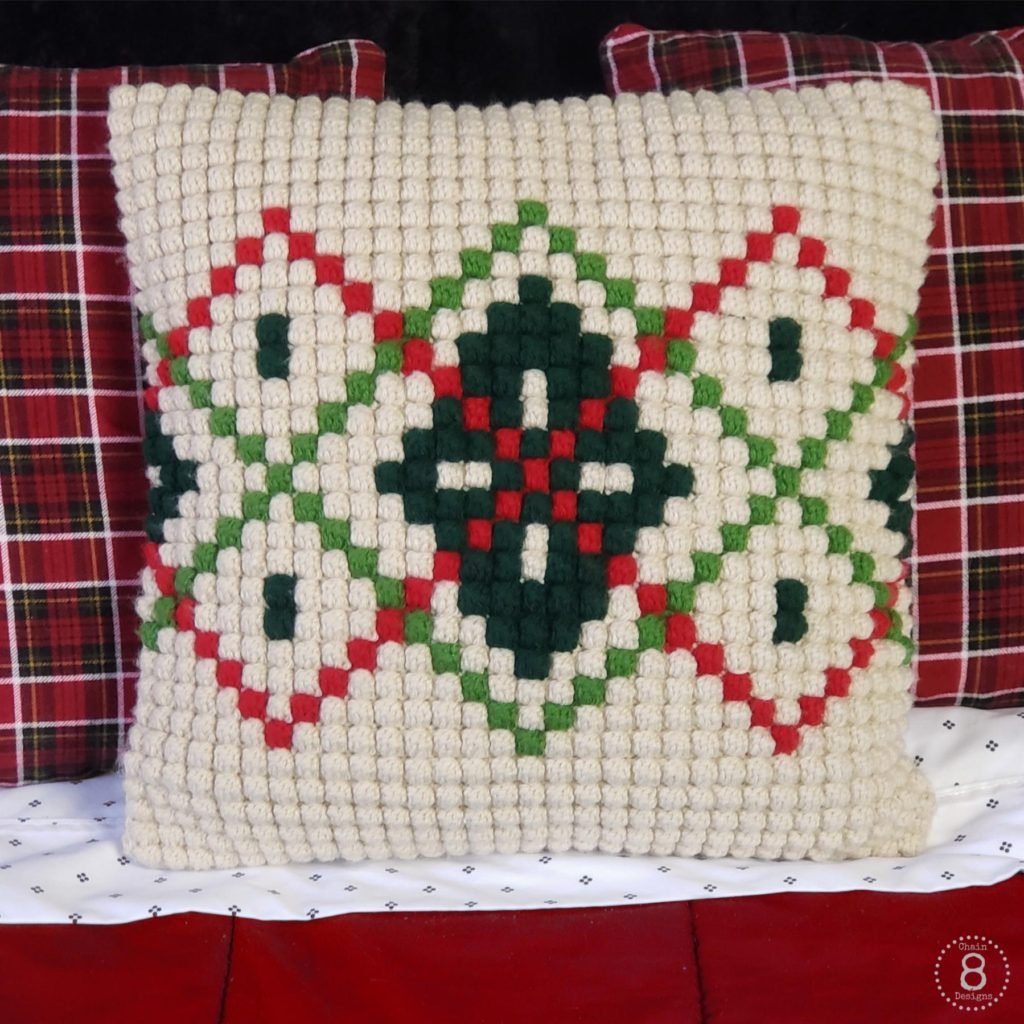
The simple design can be adapted to fit any holiday decor color scheme. I had one tester that made the upper and lower sections in green and kept the reindeer portion in red, it looked fabulous! With holiday decor trends straying further and further away from “traditional” colors, I think this would look great in black and white or pink and white. The possibilities are only limited by your imagination.
Here are some possible color ideas…
FREE PATTERN VERSION vs. PREMIUM VERSION
The pattern below is the free version and has all the information you’ll need to make your own Reindeer Games Pillow Cover but there is also a premium PDF version of the pattern. The premium version features pictures of all the finished pattern pieces, assembly, and extra pictures for any fiddly bits. The pattern also comes with the full-colored bobble chart and a copy of my Bobble Stitch Tutorial for those that are new to the stitch or need a refresher. The premium version is perfect for those that prefer to work from a paper copy versus from a digital version. No need to worry about ads, comments, or bad formatting that you get when you print straight from the free version. You can purchase a copy from my Ravelry shop. I’m setting up an Etsy shop, but it’s not done just yet. I will let you know as soon as it’s all done.
The front cover is made using the bobble stitch. If you have never worked with the bobble stitch before or need a refresher, please check out my Bobble Stitch Tutorial.
Please read each section carefully. There are notes and suggestions to help you along the way.
Make sure to complete both gauge swatches before you begin. Not everybody’s tension is the same and not all worsted weight yarn is created equal, both can impact the overall size of your finished project. I have a tendency to crochet with a tighter tension so keep that in mind as you are making your swatches. For the most accurate measurement, measure the bobble swatch from the backside.
FRONT COVER
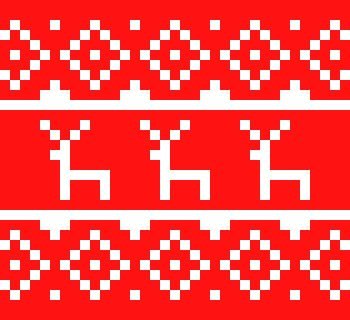
For the front cover we will be following a bobble chart. If you have never worked with a bobble chart before, please read my Bobble Stitch Tutorial for instructions on how to follow the chart.
*At this time there is not a set of full written directions for the front cover.*
We will be using a five (5) double crochet bobble.
Each square on the chart represents one (1) completed bobble.
The chart is worked from bottom to top and right to left. Start at 1/1 in the bottom right-hand corner.
Yarn Carries: I carried both of the colors throughout the whole pattern.While you will use a little more yarn, you will not have many ends to weave in. YAY!
After you have finished approximately four bobble rows, compare the width of your cover to the finished measurement to make sure that your tension has not changed from when you completed your gauge swatch.
Because each square of the chart is one completed bobble stitch, each row will have a part one (single crochet row) and a part two (bobble stitch row) i.e., Row 1/1 and Row 1/2. Once you have Row 1/1 and Row 1/2 done, you will have completed Row 1 of the chart and so on.
CH 71 (with Red)
Row 1/1: SC in 2nd CH from hook; SC next 69; CH 1; turn (70)
Row 3/2: (R) BO x1; (W) BO x1; (R) BO x3; (W) BO x1; (R) BO x3; (W) BO x1; (R) BO x3; (W) BO x1; (R) BO x3; (W) BO x1; (R) BO x3; (W) BO x1; (R) BO x3; (W) BO x1; (R) BO x3; (W) BO x1; (R) BO x3; (W) BO x1; (R) BO x1; change to (W) CH 1; turn (70)
Row 4/2: (W) BO x1; (R) BO x1; (W) BO x1; (R) BO x5; (W) BO x1; (R) BO x1; (W) BO x1; (R) BO x5; (W) BO x1; (R) BO x1; (W) BO x1; (R) BO x5; (W) BO x1; (R) BO x1; (W) BO x1; (R) BO x5; (W) BO x1; (R) BO x1; (W) BO x1; CH 1; turn (70)
Continue to follow the chart until complete. Fasten off after the last stitch and weave in ends.
The finished measurement should be approximately 17″ x17 1/2″.
BE SURE TO CHECK OUT MY OTHER FREE HOLIDAY PATTERNS!
The large back piece is the main back cover and will have buttonholes at the bottom.
CH 71 (with Background Color)
Row 1:SC in 2nd CH from hook; SC next 69; CH 1; turn (70)
Row 2: SC all; CH 1; turn (70)
Repeat Row 2 until your LARGE BACK PIECE measures 1/2″ shorter than the FRONT COVER.
Button Row:SC next 4; [*CH 2; SK 2; SC next 8]; repeat [*] five more times; CH 2; SK 2; SC next 4; CH 1; turn (70)
Finishing Row: SC all; fasten off; weave in ends (70)
The finished measurement should be approximately 17″ x 17 1/2″.
SMALL BACK PIECE
The small back piece is what we will be attaching the buttons to.
CH 71 (with Background Color)
Row 1:SC in 2nd CH from hook; SC next 69; CH 1; turn (70)
Row 2-9:SC all; CH 1; turn (670)
Row 10: SC all; fasten off; weave in ends (70)
The finished measurement should be approximately 17″ x 2 1/4″.
ASSEMBLY
NOTES:
To assemble the pillow, we will be crocheting two rows of SC around the outside edge of the pillow.I used the white yarn to give the pillow a faux piping look.
We will be putting three (3) SC in each corner.As there is no real corner stitch, for the first row of SC, the corner stitches will be the first and last stitches of the top and bottom edges.Place a stitch marker on the second corner SC of each corner to dictate where to put the three corner SC on the second row.
ATTACHING THE SMALL BACK PIECE
Begin by laying the front cover face down then align the small back piece along the bottom edge.Place a few stitch markers to hold it in place.
Flip the cover back over so the front of the front cover is facing you.
Insert your hook in the first stitch of the right-hand corner (going through both the front cover and small back piece) and pull up a loop, YO, pull through the loop, and SC into the same stitch space.This will be the first SC corner stitch (mark with a stitch marker). SC once more in the same stitch space (2nd corner stitch).
Continue to SC along the bottom edge until you reach the last stitch, where you will place 2 SC (making sure to mark the second SC).
Leave the yarn attached and move to the Attaching the Large Back Piece section.
ATTACHING THE LARGE BACK PIECE
Flip the cover back over so the front cover is facing down.
Lay the large back piece over the front cover (making sure the buttonholes are at the bottom.
Place either stitch markers or scrap pieces of yarn around the edge to keep the piece in place.
Flip the cover back over so the front cover is facing up.
SC into the same space as your last stitch. Going through the front cover, small back piece, and the large back piece.This is your third stitch for this corner.
SC up the side. [Make sure for the part where the side of the small back piece is, that you are crocheting together only the front cover and large back piece. Not crocheting the small back piece at the sides will aid in attaching the buttons.]
Place 3 SC in the first stitch of the top edge, then continue to SC across the top until you reach the last stitch, where you will place 3 SC.
SC down the other side.
Place the last stitch in the same space as the very first SC stitch. This will create the third stitch for this corner.
SL st to the first SC and CH 1.
Place 2 SC in the stitch you just SL st to.
Continue to SC around the whole edge of the pillow, putting 3 SC in the second SC of each corner stitch that you marked on the previous row.
SSCF to the very first SC of the row, fasten off and weave in ends.
ATTACHING THE BUTTONS
Lay the cover face down and smooth it out.
Pull the large back piece down so that the bottom edge aligns with the bottom edge of the front cover/small back piece.
Insert the non-hook end of your hook or your yarn needle into the center of the middle buttonhole.
Without removing the hook, lift the large back piece.This will show you where you will place the first button.
Attach the button
Repeat Steps 3-5 until you have attached all seven buttons.
FINISHING
Once your cover is complete, the last step is to insert your pillow form and close the buttons. Now you can stand back and admire the beautiful work you did.
For an added touch, you can add pom poms or tassels to make it just that little bit more special. For my version, I made (4) 2″ pom poms from my leftover yarn.
WAY TO GO YOU!
If you make this pattern, I would love to see your finished pillows. Post on Instagram and tag @chain8designs so I can ooh and ahh at your magnificent work! I love nothing more than seeing people use my patterns, especially when you use different colors than I did. I’ve seen color combos that I never thought of and like more than the original. LOL
If you have any questions about this pattern, please don’t hesitate to e-mail me at chain8designs@gmail.com. Put the pattern name as the subject line and I will get back to you as soon as I can. You can also send me a message on Facebook through the Chain 8 Designs page. I want everyone to enjoy making this pattern, so don’t hesitate to contact me if you have any questions or problems along the way. I’m always here to help.
Till next time friends…HAPPY HOOKING!
**Feel free to make and sell items that are made from this pattern. Please link back to the pattern on any online sales or include my web address on tags for any in-person sales. Please do not republish or distribute any of the pictures or patterns, in any form, from this site without permission from me. Please e-mail me for any inquiries.**
Would you like a downloadable or printable copy of the pattern with pictures to help you along the way?
No ads or comments
PURCHASE A COPY ON RAVELRY TODAY!
The pattern includes:
Full materials list
Full list of crochet stitch abbreviations
Two gauge swatches to ensure proper sizing
Bobble chart (full color with numbered rows)
Measurements of each completed pattern piece
Photos of each completed pattern piece and pictures to show any tricky bits
Also included with your purchase in a copy of my Bobble Stitch Tutorial to teach you how to make the stitch and follow a bobble chart


Add a Comment