
Turkey, gravy, stuffing, pumpkin pie…oh my! Ahhhh, just the thought of Thanksgiving has me drooling like Homer Simpson lusting after a doughnut. I admittedly become a complete glutton at Thanksgiving and love every minute of it…calories be damned!
After I gobble till I wobble, I usually cuddle on the couch for some football and a much needed, tryptophan-induced nap. What better way to do that than on this cute pillow?
Like the Mr. Jack O’ Lantern and Boo Halloween pillows I made last year, this pillow is made with the bobble stitch. It is a super easy stitch that even a beginner can easily do. Plus, the nubby texture it creates is amazing.
What I find to be the best feature of this pillow is that it’s a pillow cover. If your drunk Uncle Jerry accidentally spills cranberry sauce all over it, it can easily be taken off and thrown in the washer. Also, after the holidays, it can be folded up and easily packed away for next year…no need to find a place to store a bulky pillow.
NOT READY TO MAKE RIGHT NOW?
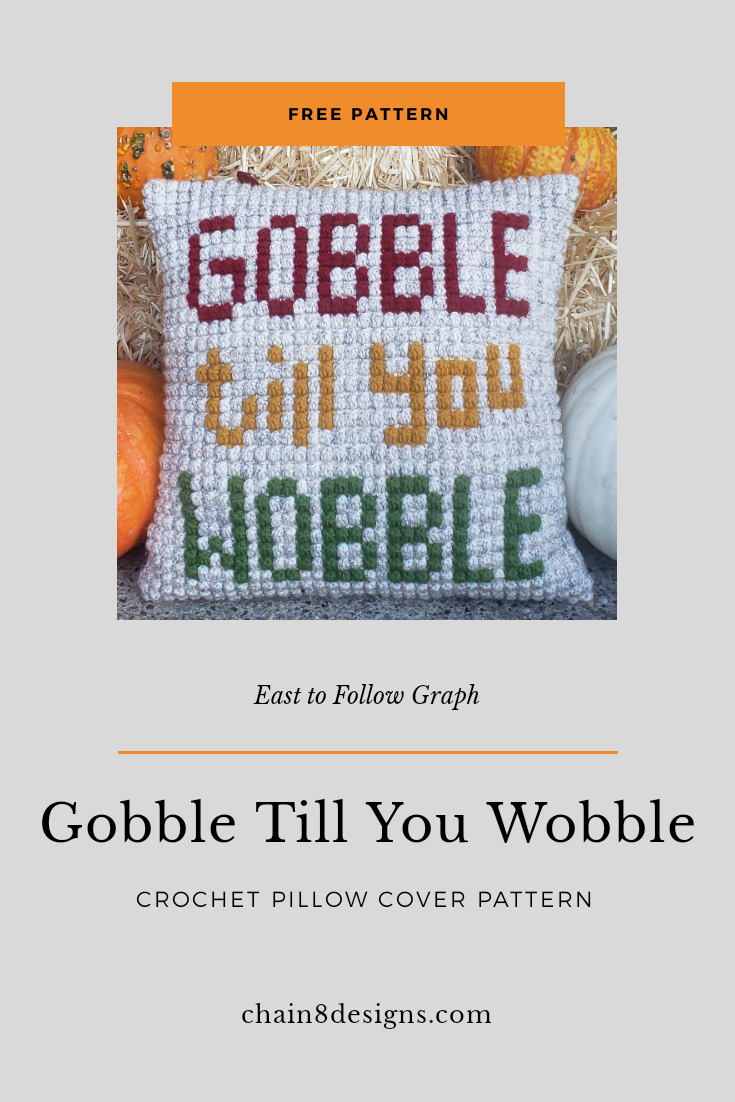
MAKE SURE TO PIN FOR LATER!


Would you like an easy to download/print copy of this pattern? No ads, no comments. Your purchase of the pattern goes to support this site and allows me to bring you more free patterns.
You can purchase a PDF copy of the pattern on Ravelry.
Thank you for supporting Chain 8 Designs!
GOBBLE TILL YOU WOBBLE THANKSGIVING PILLOW COVER

DISCLAIMER: This post may contain affiliate links. I receive a small percentage from any purchases you may make (at no cost to you.)
MATERIALS NEEDED:
- 4 Skeins Vanna’s Choice Yarn in Wheat
- 1 Skein Vanna’s Choice Yarn in Cranberry
- 1 Skein Vanna’s Choice Yarn in Kelly Green
- 1 Skein Loops and Threads Impeccable in Gold
- 18″ x 18″ Pillow Form
- Size G Hook
- Yarn Needle
- Scissors
- (5) 9/16″ Buttons (Color of your choice)
- Ruler or Tape Measurer
- Stitch Markers [optional]
ABBREVIATIONS:
- CH = Chain
- SC = Single Crochet
- DC = Double Crochet
- DC2tog = Double Crochet Two Together
- Bob = Bobble
- [T] = Tan
- [G] = Green
GAUGE:
- 8 1/2 Bobbles x 7 Rows = 4″ x 4″
- 16 DC x 9 Rows = 4″ x 4″


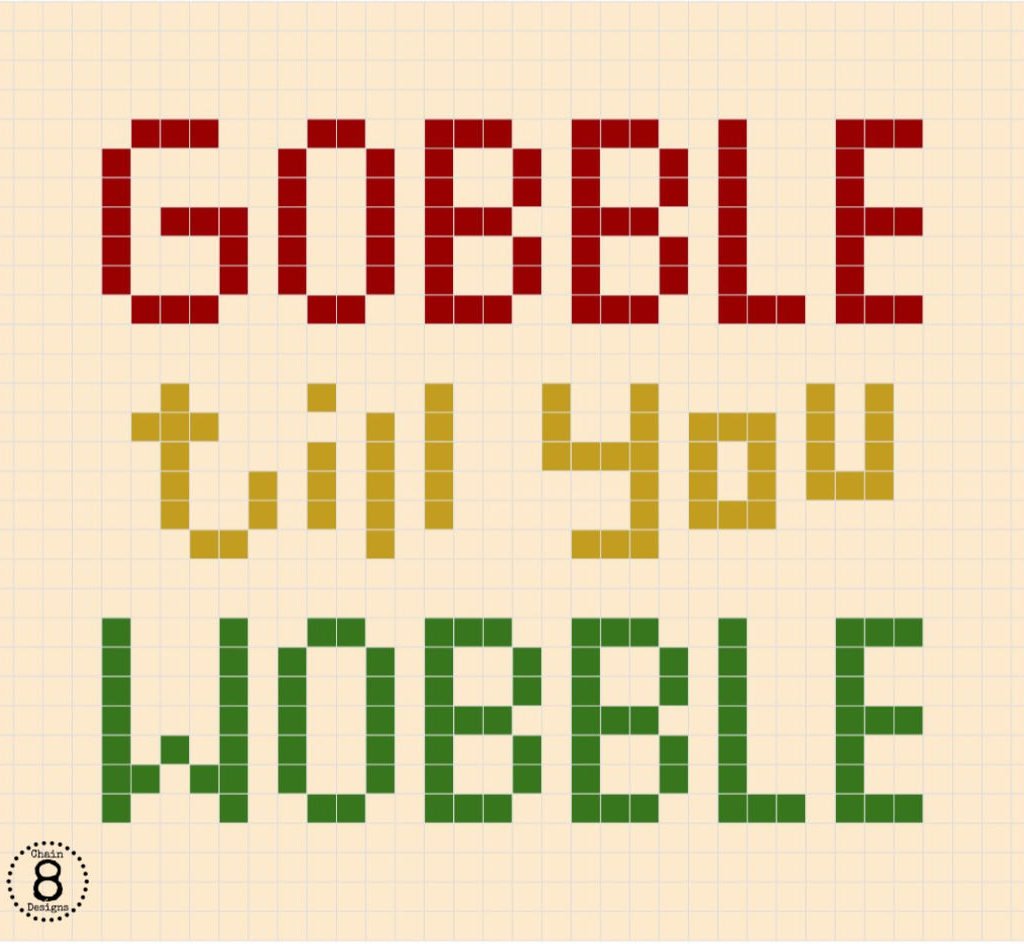
GRAPH
- The graph is worked from bottom to top and right to left. Start at the box marked 1/1 in the bottom right-hand corner.
- Each box counts as one bobble stitch.
- Bobbles are a three double crochet bobble.
- After you finish the last stitch of the graph DO NOT fasten off…we will continue on and make the top flap.
- Crochet over the yarn carries for a nice and tidy inside.
If you are unfamiliar with the bobble stitch and how to follow these types of graphs please read my Bobble Stitch Tutorial HERE.
We will start our pillow by working on the graph first. I will walk you through the first few rows to get you started.
CH 73 with Tan
Row 1/1: SC in 2nd CH from hook; SC next 71; CH 1; turn (72)
Row 1/2: [*Bob; SC]; repeat [*] till end; CH 1; turn (72)
Row 2/1: SC all; CH 1; turn (72)
Row 2/2: [*Bob; SC]; repeat [*] till end; CH 1; turn (72)
Row 3/1: SC all; CH 1; turn (72)
Row 3/2: [*Bob; SC]; repeat [*] till end; CH 1; turn (72)
Row 4/1: SC all; CH 1; turn (72)
Row 4/2: [*Bob; SC]; repeat [*] till end; CH 1; turn (72)
Row 5/1: [T]SC 8; [G] SC 6; [T] SC 2; [G] SC 6; [T] SC 4; [G] SC 6; [T] SC 4; [G] SC 6; [T] SC 4; [G] SC 4; [T] SC 4; [G] SC 2; [T] SC 6; [G] SC 2; [T] SC 8; CH 1; turn
Row 5/2: ([T] Bob; SC x4); ([G] Bob; SC); ([T] Bob; SC x3); ([G] Bob; SC); ([T] Bob; SC x2); ([G] Bob; SC x2); ([T] Bob; SC x2); ([G] Bob; SC x3); ([T] Bob; SC x2); ([G] Bob; SC x3); ([T] Bob; SC x2); ([G] Bob; SC x3); ([T] Bob; SC); ([G] Bob; SC x3); ([T] Bob; SC x4); CH 1; turn
Row 6/1: [T] SC 12; [G] SC 2; [T] SC 6; [G] SC 2; [T] SC 2; [G] SC 2; [T] SC 4; [G] SC 2; [T] SC 2; [G] SC 2; [T] SC 4; [G] SC 2; [T] SC 2; [G] SC 2; [T] SC 4; [G] SC 2; [T] SC 2; [G] SC 4; [T] SC 2; [G] SC 4; [T] SC 8
Row 6/2: ([T] Bob; SC x4); ([G] Bob; SC x2); ([T] Bob; SC); ([G] Bob; SC x2); ([T] Bob; SC); ([G] Bob; SC); ([T] Bob; SC x2); ([G] Bob; SC); ([T] Bob; SC); ([G] Bob; SC); ([T] Bob; SC x2); ([G] Bob; SC); ([T] Bob; SC); ([G] Bob; SC); ([T] Bob; SC x2); ([G] Bob; SC); ([T] Bob; SC); ([G] Bob; SC); ([T] Bob; SC x3); ([G] Bob; SC); ([T] Bob; SC x6); turn
Continue to follow the graph and remember to NOT fasten off at the end, we will be continuing on and adding the top flap next.


TOP FLAP
- The chain counts as a stitch.
- Place the last stitch of the row in the top of the chain of the previous row.
Row 1: CH 3; DC2tog; DC next 68; DC2tog; turn (71)
Row 2: CH 3; DC2tog; DC next 67; DC2tog; turn (70)
Row 3-35: CH 3; DC next 68; DC2tog; turn (70)
Row 36: CH 3; DC next 68; DC2tog; fasten off and weave in end (70)
BUTTON FLAP
- The chain counts as a stitch.
- Place the last stitch of the row in the top of the chain of the previous row.
Now that the graph and top flap are done, we will flip the whole thing around and start working on the button flap.
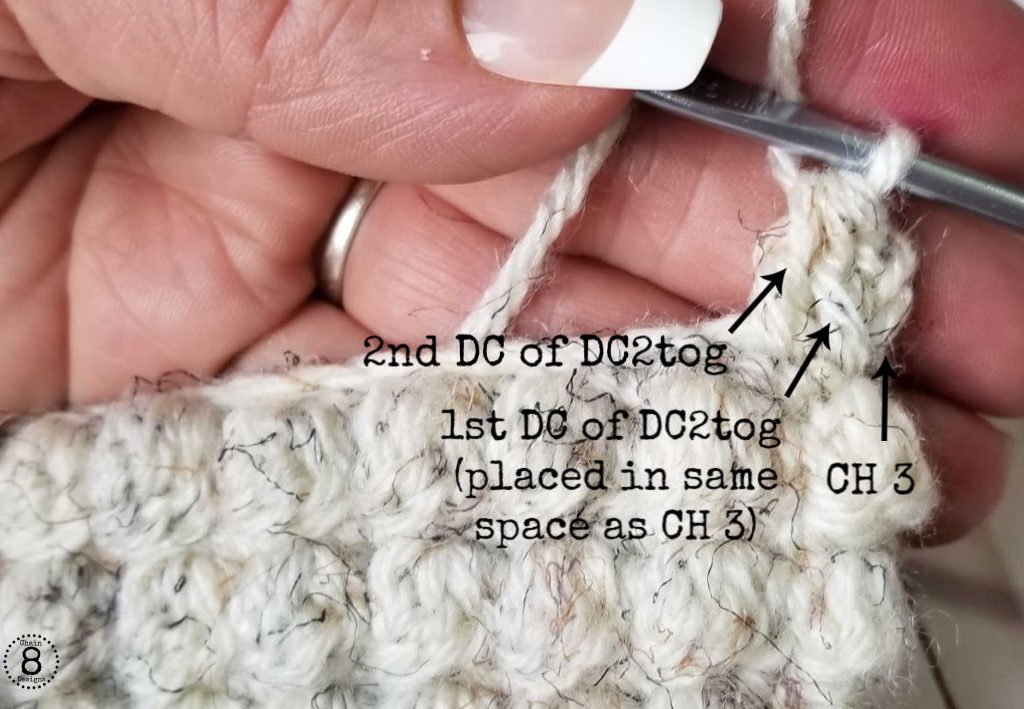
Starting in the first CH space, insert your hook and pull up a loop then…
Row 1: CH 3; DC2tog (with first DC in same space as CH 3); DC next 68; DC2tog; turn (71)
Row 2: CH 3; DC2tog; DC next 67; DC2tog; turn (70)
Row 3: CH 3; DC next 68; DC2tog; fasten off and weave in end (70)
ASSEMBLY
First, we want to attach the buttons before sewing up the sides. Place the first button in the center (one row down from the bobbles). Place the next buttons 7 1/2″ to each side of the middle button. Now measure 2 1/2″ from each side of the center button and place the next buttons. Finish off by measuring 2 1/2″ in from each outside button and attach the last two buttons.

With the cover facing up, fold the top flap down over the front, aligning the bottom with the bottom row of bobbles. Place a stitch marker or scrap piece of yarn to hold the flap in place. Now take the button flap and fold it up and over the top flap and again secure with stitch markers or scraps of yarn.


Take a 60″ piece of tan yarn and your yarn needle. Starting at the top edge fold, tie a knot with your thread at the fold and then proceed to whipstitch down the side; making sure to not stitch through your bobbles. Also, make sure when you reach the bottom where the button flap and top flap overlap that you stitch through all three layers. Repeat the process with the other side.
Last but not least, flip the cover to the right side, insert your pillow form, then sit back and admire all your hard work!


I hope that everyone has a fun, football, food, friends, and family-filled Thanksgiving. Remember, calories don’t count on Thanksgiving so embrace your inner Homer Simpson. LOL
As always, I would love to see pictures of your pillows. Post on Instagram and use #chain8designs. Till next time…HAPPY HOOKING!

**Feel free to make and sell items that are made from this pattern. Please link back to the pattern on any online sales or include my web address on tags for any in-person sales. Please do not republish or distribute any of the pictures or patterns, in any form, from this site without permission from me. Please e-mail me for any inquiries.**