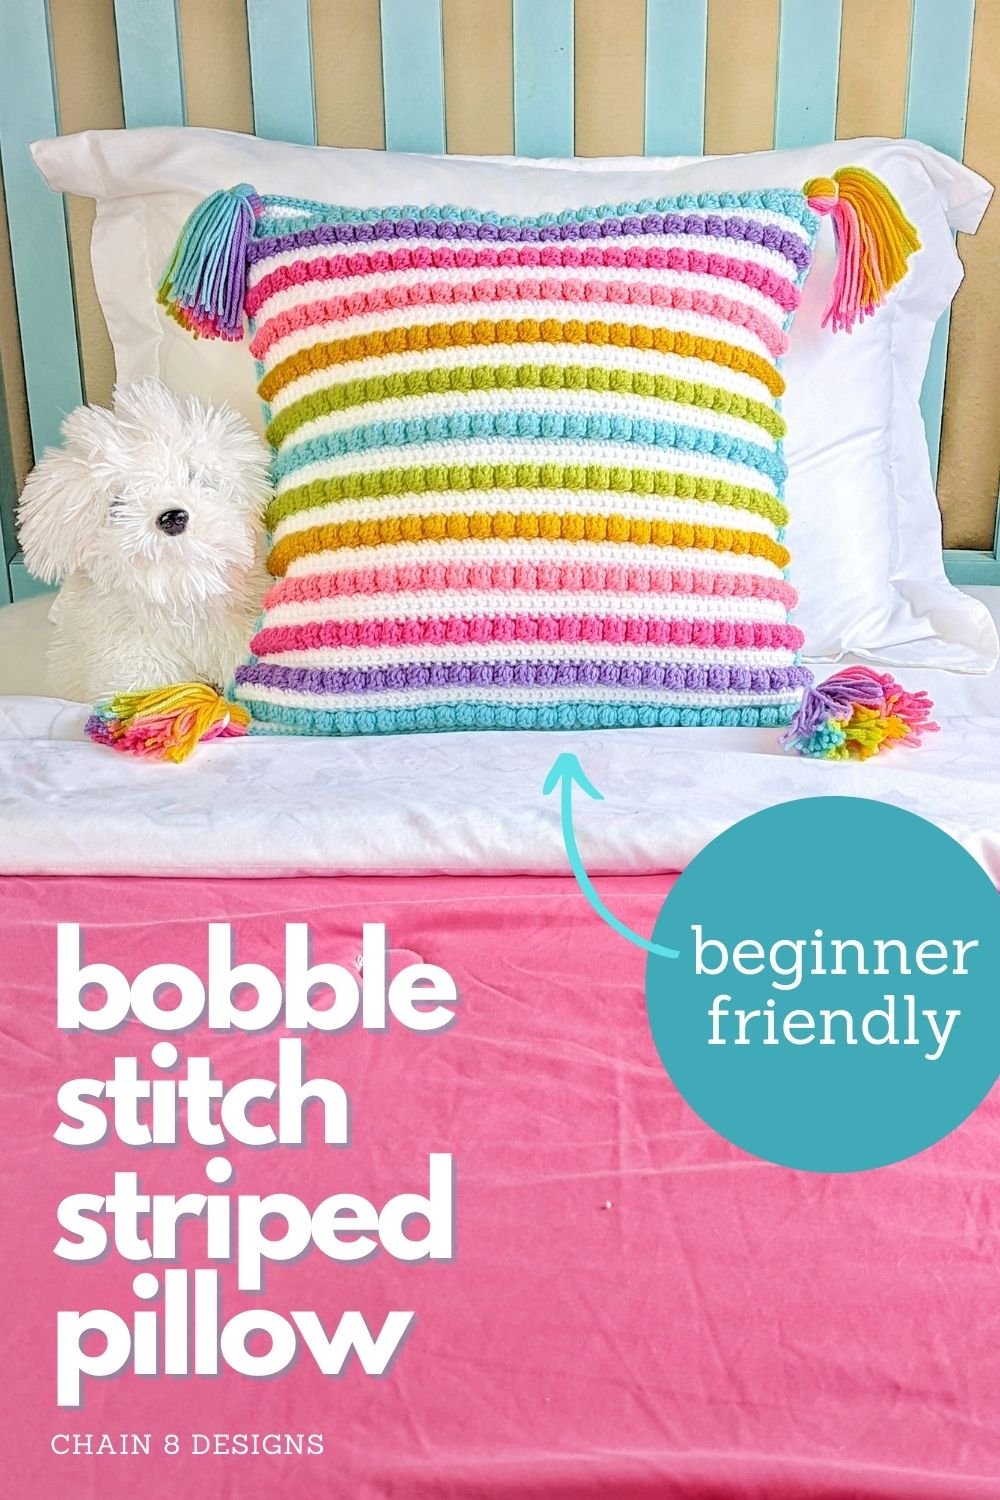
BOBBLE STITCH STRIPED PILLOW
Are you looking for a fun beginner project that you can easily customize to fit your personal home decor? If so, this striped bobble stitch pillow is just the pattern for you!
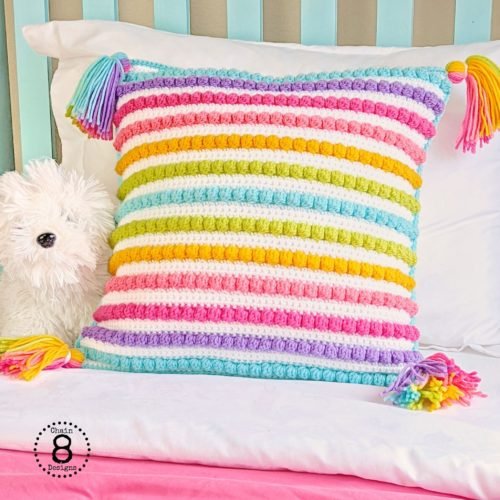
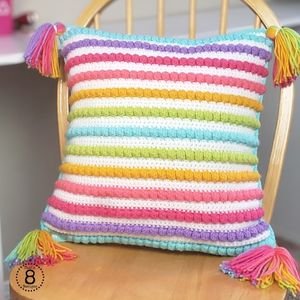
Now that my daughter is getting closer to the preteen age, she really wanted to give her room an update. She gave all the unicorn decor an eviction notice and we got to work figuring out what “big kid” decor she wanted. She is very much like her mama and is into all things arts and crafts, so we knew that she was going to be getting an art desk. As far as the color, she is into anything rainbow-colored. While we didn’t want to put an actual rainbow anywhere, we did want to work in rainbow-colored touches here and there. I knew I wanted to make her a new pillow for her bed and the Bobble Stitch Striped Pillow was born. It looks so cute on her bed, and she is super happy with her new room. Mom for the win!
The pattern is a simple repeat of single crochet and bobble rows, which create a fun striped design. The two stitches together give the pillow a great texture. Because of the easy nature of the stitches, the Bobble Stitch Striped Pillow is perfect for beginners. If you can make a single and double, you can make this pillow!
THE BOBBLE STITCH
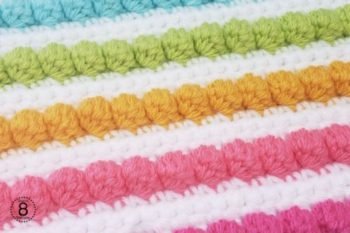
I can’t say enough about the bobble stitch, it is my absolute favorite stitch. The cluster of stitches pop out on the front and give you an awesome texture that is great for so many different projects. The bobble stitch is constructed with only single and double crochets, making it an easy stitch for beginners to learn. If you have never worked with the bobble stitch before, I have a Bobble Stitch Tutorial to teach you how.
COLOR COMBOS
This design lends itself to any number of color combinations. There are 13 colored stripes, for a balanced look, I suggest using either one, two, four, or six colors for your stripes. Use white with navy stripes for a nautical look, try white with red and green stripes for Christmas, or maybe red, with white and pink stripes for Valentine’s Day. The color possibilities are endless!

One Color

Two Colors

Four Colors

Six Colors
FREE PATTERN VERSION vs. PREMIUM VERSION
The pattern below is the free version and has all the information you’ll need to make your own Bobble Stitch Striped Pillow, but there is also a premium PDF version of the pattern. The premium version features pictures of all the finished pattern pieces, assembly, and extra pictures for any fiddly bits. The pattern also comes with a full-colored bobble chart (to make keeping track of your rows super easy, and a copy of my Bobble Stitch Tutorial for those that are new to the stitch or need a refresher. The premium version is perfect for those that prefer to work from a paper copy versus from a digital version. No need to worry about ads, comments, or bad formatting that you get when you print straight for the free version. You can purchase a copy from my Ravelry shop below.
BOBBLE STITCH STRIPED PILLOW
DISCLAIMER: This post may contain affiliate links. As an Amazon Associate, I earn from qualifying purchases (at no cost to you.)
MATERIALS:
- 465 Yards Worsted Weight Yarn in White
- 66 Yards Worsted Weight Yarn in Aqua
- 45 Yards Worsted Weight Yarn in Lime Green
- 45 Yards Worsted Weight Yarn in Yellow
- 45 Yards Worsted Weight Yarn in Peach
- 45 Yards Worsted Weight Yarn in Pink
- 45 Yards Worsted Weight Yarn in Purple
- Size G Hook [4.00 mm]
- (5) 3/4″ to 7/8″ Buttons
- 18″ x 18″ Pillow Form
- Yarn Needle
- Scissors
- Stitch Markers
- Sewing Needle and Thread to Match Buttons [optional]
STITCH ABBREVIATIONS:
- Bob = Bobble [refers to the double crochet bobble and the single crochet in the following stitch]
- CH = Chain
- SC = Single Crochet
- SK = Skip Stitch
- SL st = Slip Stitch
- SSCF = Seamless Single Crochet Finish
- YO = Yarn Over
GAUGE:
- 15 Single Crochet x 18 Rows = 4″ x 4″
EXPERIENCE LEVEL:
- Beginner
PATTERN WRITTEN IN:
- US Terms
FINISHED MEASUREMENTS:
- Approximately 17″ x 17″
THE YARN I USED:
WHITE = Big Twist in White
AQUA = Big Twist in Aqua
LIME GREEN = Loops & Threads Impeccable in Citron
YELLOW = Big Twist in Varsity Yellow
PEACH = Big Twist in Watermelon
PINK = Big Twist in Bubblegum
PURPLE = Big Twist in Lilac
Would you like a downloadable or printable copy of the pattern with pictures to help you along the way?
No ads or comments
PURCHASE A COPY ON RAVELRY TODAY!
The pattern includes:
- Full materials list
- A list of all crochet stitch abbreviations
- Gauge swatch to ensure proper sizing
- Full written instructions
- Full-color chart of the front cover to make keeping track of your row count super easy
- Measurements of each completed pattern piece
- Photos of each completed pattern piece and pictures to show any tricky bits
- Also included with your purchase is a copy of my Bobble Stitch Tutorial
PATTERN PIECES
NOTES BEFORE YOU BEGIN:
- The front cover is made using the bobble stitch. If you have never worked with the bobble stitch before or need a refresher, please read my Bobble Stitch Tutorial.
- Please read each section carefully, there are notes and suggestions to help you along the way.
- Make sure to complete the gauge swatch before you begin. Not everyone’s tension is the same and not all worsted weight yarn is created equal, both can impact the overall size of your finished project.
FRONT COVER
NOTES:
- We will be using a five (5) double crochet bobble.
- Do NOT crochet over your yarn ends, weave in all ends once you have the front cover complete.
- We will be making three rows of white single crochets between each row of bobble stitches. Because of the nature of the bobble stitch, we will need to fasten off after the end of each third white row (which will end on the left edge). To start the first row of the bobble stitch rows we will attach the new color on the far-right side and continue on.
- HOW TO ATTACH ON A NEW COLOR: Insert your hook in the first stitch of the row and pull up a loop, YO, and pull through. Pull the loop tight and start the first stitch of the row in the same stitch space.
CH 61 [with WHITE]
Row 1: SC in 2nd CH from hook; SC next 59; CH 1; turn (60)
Row 2: SC all; switch to AQUA; CH 1; turn (60)
Row 3: SC all; CH 1; turn (60)
Row 4: Bob all; switch to WHITE; CH 1; turn (60)
Row 5-6: SC all; CH 1; turn (60)
Row 7: SC all; fasten off (60)
Row 8: [attach PURPLE] SC all; CH 1; turn (60)
Row 9: Bob all; switch to WHITE; CH 1; turn (60)
Row 10-11: SC all; CH 1; turn (60)
Row 12: SC all; fasten off (60)
Row 13: [attach PINK] SC all; CH 1; turn (60)
Row 14: Bob all; switch to WHITE; CH 1; turn (60)
Row 15-16: SC all; CH 1; turn (60)
Row 17: SC all; fasten off (60)
Row 18: [attach PEACH] SC all; CH 1; turn (60)
Row 19: Bob all; switch to WHITE; CH 1; turn (60)
Row 20-21: SC all; CH 1; turn (60)
Row 22: SC all; fasten off (60)
Row 23: [attach YELLOW] SC all; CH 1; turn (60)
Row 24: Bob all; switch to WHITE; CH 1; turn (60)
Row 25-26: SC all; CH 1; turn (60)
Row 27: SC all; fasten off (60)
Row 28: [attach LIME GREEN] SC all; CH 1; turn (60)
Row 29: Bob all; switch to WHITE; CH 1; turn (60)
Row 30-31: SC all; CH 1; turn (60)
Row 32: SC all; fasten off (60)
Row 33: [attach AQUA] SC all; CH 1; turn (60)
Row 34: Bob all; switch to WHITE; CH 1; turn (60)
Row 35-36: SC all; CH 1; turn (60)
Row 37: SC all; fasten off (60)
Row 38: [attach LIME GREEN] SC all; CH 1; turn (60)
Row 39: Bob all; switch to WHITE; CH 1; turn (60)
Row 40-41: SC all; CH 1; turn (60)
Row 42: SC all; fasten off (60)
Row 43: [attach YELLOW] SC all; CH 1; turn (60)
Row 44: Bob all; switch to WHITE; CH 1; turn (60)
Row 45-46: SC all; CH 1; turn (60)
Row 47: SC all; fasten off (60)
Row 48: [attach PEACH] SC all; CH 1; turn (60)
Row 49: Bob all; switch to WHITE; CH 1; turn (60)
Row 50-51: SC all; CH 1; turn (60)
Row 52: SC all; fasten off (60)
Row 53: [attach PINK] SC all; CH 1; turn (60)
Row 54: Bob all; switch to WHITE; CH 1; turn (60)
Row 55-56: SC all; CH 1; turn (60)
Row 57: SC all; fasten off (60)
Row 58: [attach PURPLE] SC all; CH 1; turn (60)
Row 59: Bob all; switch to WHITE; CH 1; turn (60)
Row 60-61: SC all; CH 1; turn (60)
Row 62: SC all; fasten off (60)
Row 63: [attach AQUA] SC all; CH 1; turn (60)
Row 64: Bob all; switch to WHITE; CH 1; turn (60)
Row 65: SC all; CH 1; turn (60)
Row 66: SC all; fasten off; weave in all ends (60)
The finished measurement should be approximately 16 1/2″ X 16 1/2″.
BE SURE TO CHECK OUT MY OTHER PILLOW PATTERNS!
LARGE BACK PIECE
The large back piece is the main back cover and will have buttonholes at the bottom.
CH 61 [with WHITE]
Row 1: SC in 2nd CH from hook; SC next 59; CH 1; turn (60)
Row 2: SC all; CH 1; turn (60)
Repeat Row 2 until your LARGE BACK PIECE measures 3/4″ shorter than the FRONT COVER.
Buttonhole Row: SC 5; [*CH 2; SK 2; SC 10]; repeat [*] 3 more times; CH 2; SK 2; SC 5; CH 1; turn (60)
Finishing Row 1: SC all; CH 1; turn (60)
Finishing Row 2: SC all; fasten off; weave in ends (60)
The finished measurement should be approximately 16 1/2″ x 16 1/2″.
SMALL BACK PIECE
The small back piece is the inside placard to which we will attach the buttons.
CH 61 [with WHITE]
Row 1: SC in 2nd CH from hook; SC next 59; CH 1; turn (60)
Row 2-9: SC all; CH 1; turn (60)
Row 10: SC all; fasten off; weave in ends (60)
The finished measurement should be approximately 16 1/2″ x 2″.
Would you like a downloadable or printable copy of the pattern with pictures to help you along the way?
No ads or comments
PURCHASE A COPY ON RAVELRY TODAY!
The pattern includes:
- Full materials list
- A list of all crochet stitch abbreviations
- Gauge swatch to ensure proper sizing
- Full written instructions
- Full-color chart of the front cover to make keeping track of your row count super easy
- Measurements of each completed pattern piece
- Photos of each completed pattern piece and pictures to show any tricky bits
- Also included with your purchase is a copy of my Bobble Stitch Tutorial

ASSEMBLY
NOTES:
- To assemble the pillow, we will be running a row of SC around the outside edge of the pillow.
- We will be placing three (3) SC in each corner. As there is no “real” corner stitch, the corner stitches will be the first and last stitches of the top and bottom edges.
ATTACHING THE SMALL BACK PIECE
- Begin by laying the front cover facedown and aligning the small back piece along the bottom edge. You can place a few stitch markers to hold it in place.
- Flip the cover back over so the front of the front cover is facing you.
- Insert your hook in the first stitch of the right-hand corner (going through both the front cover and small back piece) and pull up a loop, YO, and pull through the loop; then SC 2 into the same stitch space [1st & 2nd corner stitches].
- Continue to SC along the bottom edge until you reach the last stitch where you will place one (1) SC. You should now have 61 SC.
- Leave the yarn attached and move to the Attaching the Large Back Piece section.
ATTACHING THE LARGE BACK PIECE
- Flip the cover back over so the front cover is facedown.
- Lay the large back piece over the front cover (making sure the buttonholes are at the bottom and it is overlapping the small back piece).
- Place either stitch markers or scrap pieces of yarn around the edge to keep the piece in place.
- Flip the cover back over so the front cover is facing up.
- SC into the same space as the last SC from attaching the small back piece (going through the front cover, small back piece, and large back piece.) Now place one more SC in the same stitch space. This will complete the three SC for this corner.
- Next, SC up the side. [Make sure for the section where the side of the small back piece is, that you are crocheting through only the FRONT COVER and LARGE BACK PIECE. Not crocheting the small back piece at the sides will aid in attaching the buttons later.]
- Place 3 SC in the first stitch of the top edge, then continue to SC 58 stitches across the top until you reach the last stitch, where you will place the 3 SC for that corner.
- SC down the other side.
- SSCF to the first SC. This will create a third faux SC for this corner. Weave in ends.
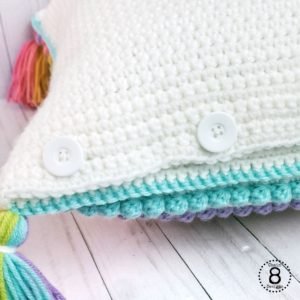
ATTACHING THE BUTTONS
- Lay the cover facedown and smooth out the large back piece so that the bottom edge aligns with the bottom edge of the front cover/small back piece.
- Insert the non-hook end of your hook into the center of a buttonhole.
- Without removing the hook, lift the large back piece. This will show you where you will place the first button.
- Attach the button.
- Repeat Steps 2-5 until you have attached all five buttons.
FINISHING
Once your cover is complete, the last step is to insert your pillow form and close the buttons. Now you can stand back and admire the beautiful work you did.
While the pillow looks great by itself, you can add tassels or pom poms for a little extra pizzaz.
WAY TO GO YOU!
If you make this pattern, I would love to see your finished pillows. Post on Instagram and tag @chain8designs so I can ooh and ahh at your magnificent work! I love nothing more than seeing people use my patterns, especially when you use different colors than I have. I’ve seen color combos that I never thought of and like more than the original. LOL
If you have any questions about this pattern, please don’t hesitate to e-mail me at chain8designs@gmail.com. Put the pattern name as the subject line and I will get back to you as soon as I can. You can also send me a message on Facebook through the Chain 8 Designs page. I want everyone to enjoy making this pattern, so don’t hesitate to contact me if you have any questions or problems along the way. I’m always here to help.
Till next time friends…HAPPY HOOKING!

**Feel free to make and sell items that are made from this pattern. Please link back to the pattern on any online sales or include my web address on tags for any in-person sales. Please do not republish or distribute any of the pictures or patterns, in any form, from this site without permission from me. Please e-mail me for any inquiries.**



Add a Comment