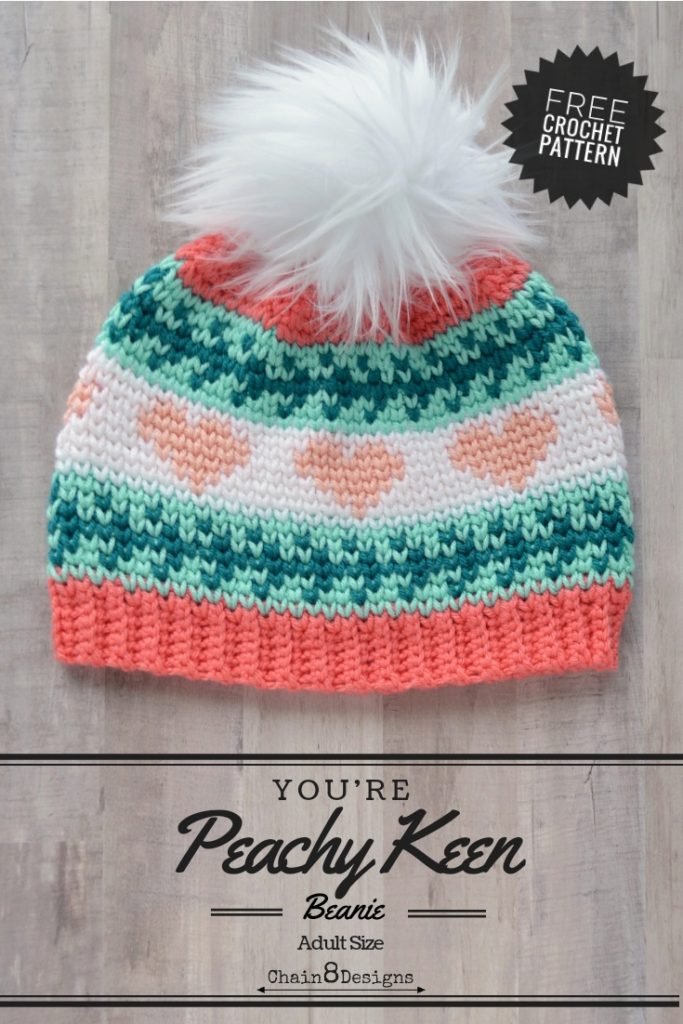
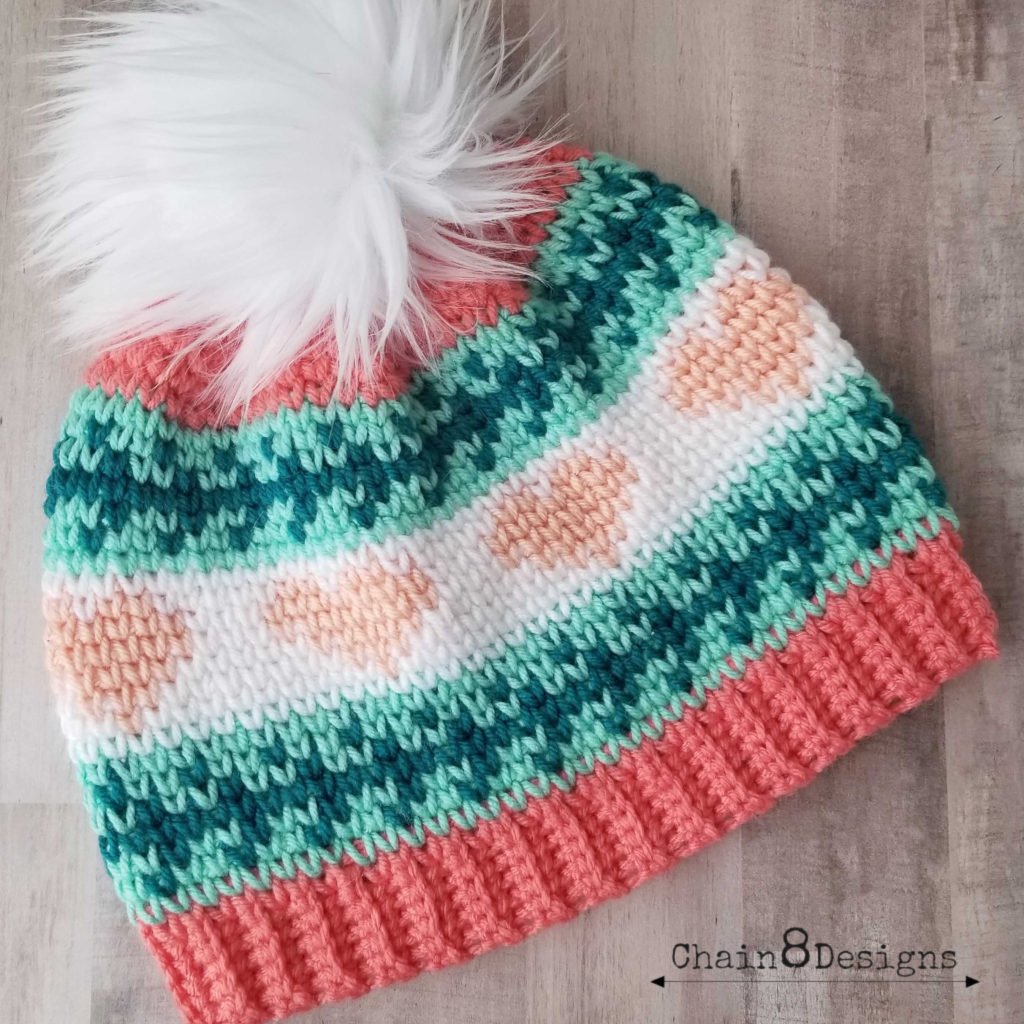
You guys asked and now you shall receive…I made the You’re Peachy Keen Beanie in an adult size and with worsted weight yarn!!!!!
I had originally thought I would update my previous post to include the directions for the adult size, but it made things a little confusing, so I thought it best to keep the two separate. This hat works up just the same as the child size but with a few tweaks. You’ll notice that I have repeated most of the same instructions and as I forgot to take pictures as I was working on this version, I will be using the same pictures from the child-sized version (apart for a couple of new ones) to help explain things. I was in such a hurry to get the adult version done that I didn’t even think about taking new pictures…bad designer/blogger! LOL
For the child-sized pattern click HERE.
For this version, I tried to find

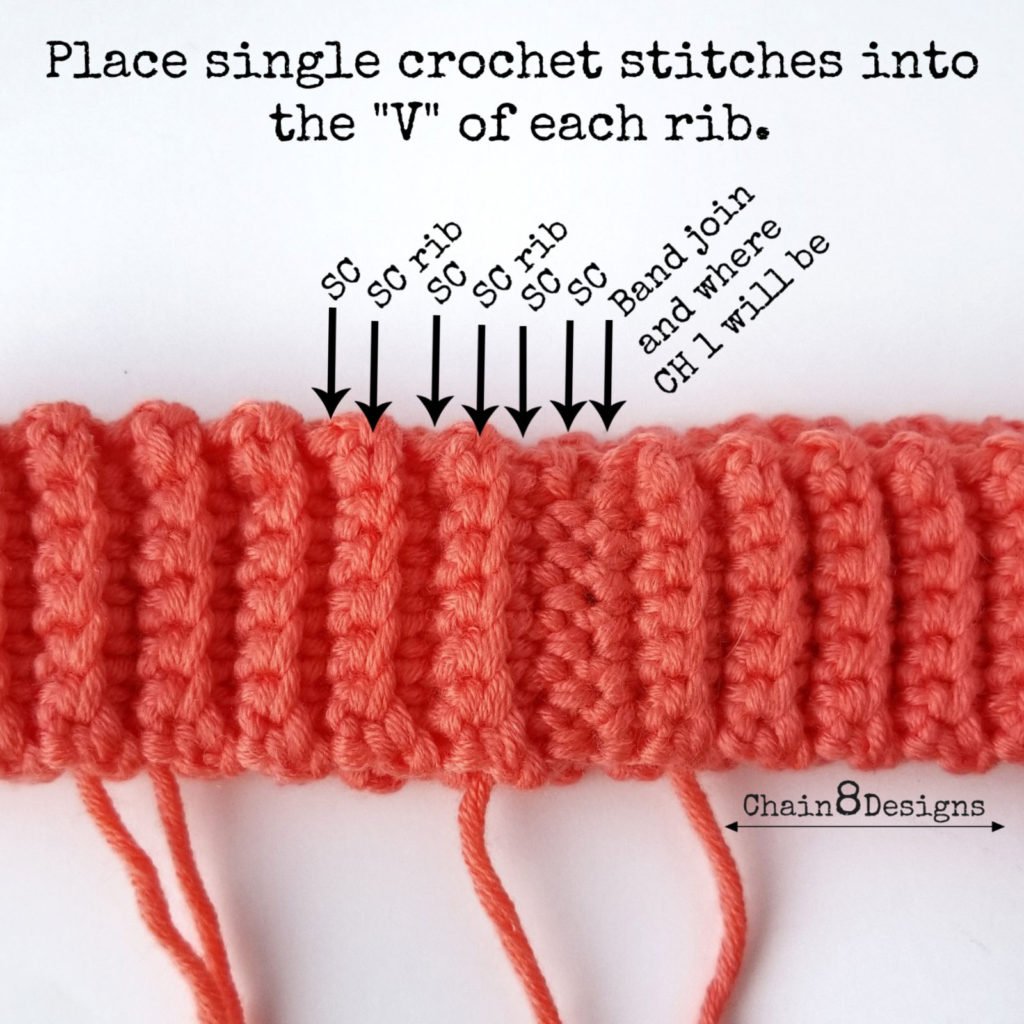
WAISTCOAT STITCH
A waistcoat stitch is simply
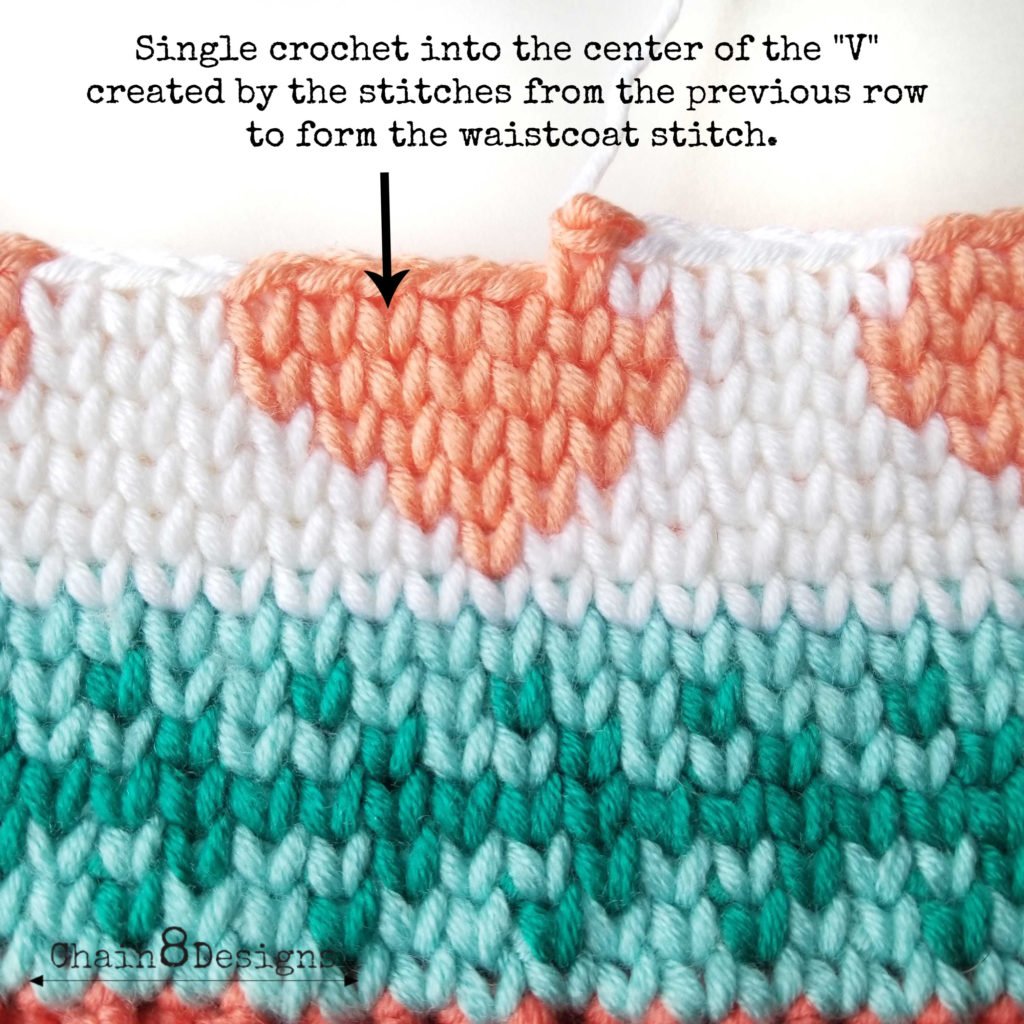
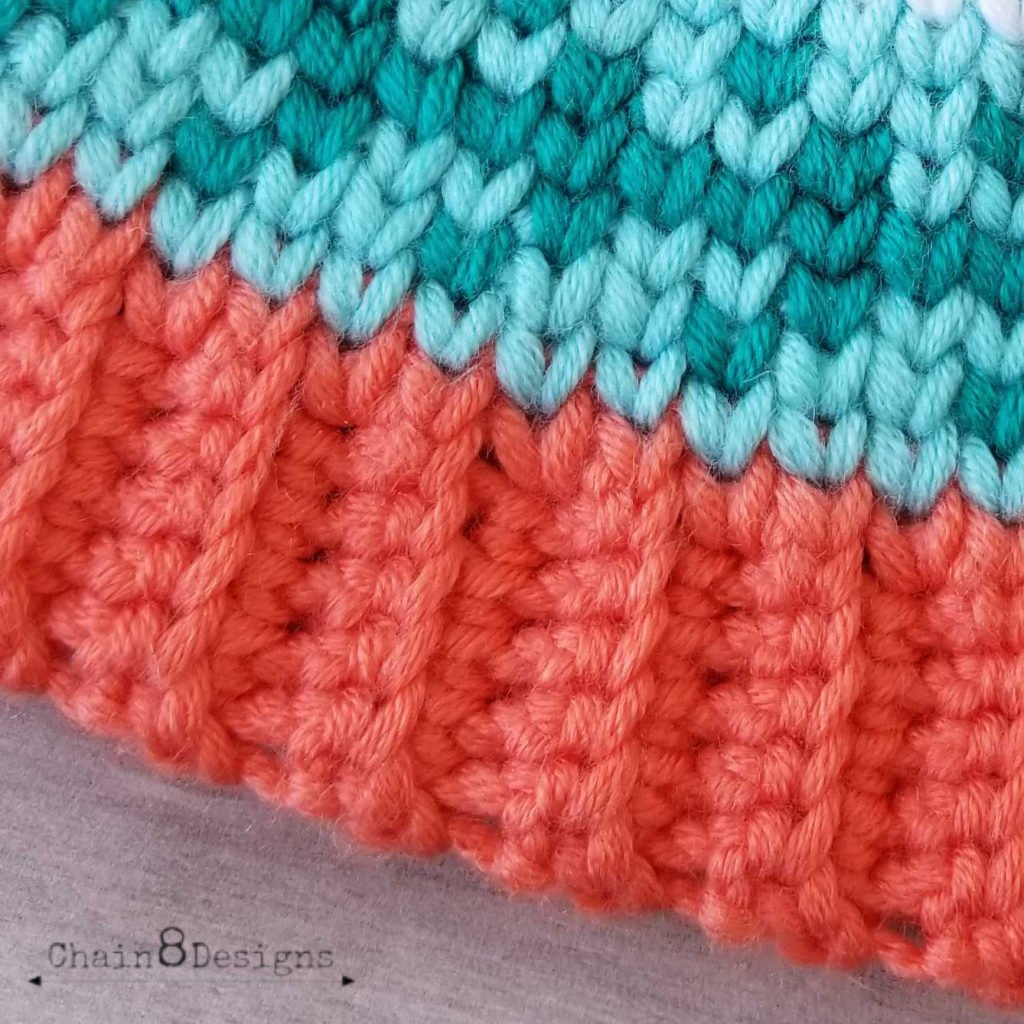
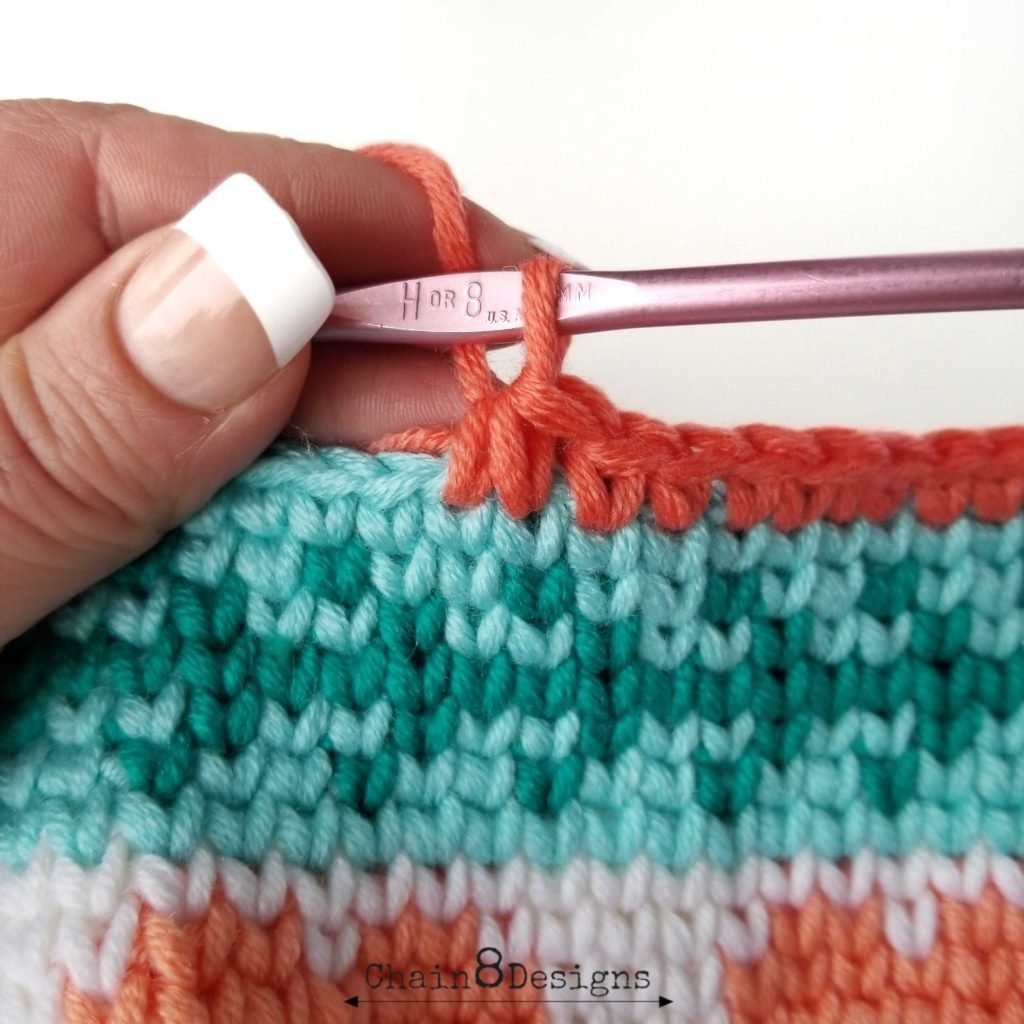
The waistcoat stitch starts with a foundation row of regular single crochets; it is on the second row that you start crocheting into the “V”. To join rows, you slip stitch into the top of the first stitch and then chain 1. Make sure to pull both the slip stitch and chain 1 tightly, this helps conceal the join. Like regular single crochet, you will notice that the stitches will angle to the left. While I have never found this to be a problem, I wanted you to be aware and not worry when you see it. The slant will not throw off the finished look.
For color changes, you will complete those just as you would for regular single crochet. Make sure that your stitches remain a consistent size. I find that sometimes the stitch before a color change gets pulled too tight and looks smaller than the stitches after it.
When it comes to carrying the yarn that is not currently being used, I like to crochet over my carries to give the inside of the hat a nice clean look. When carrying the yarn over more than a few stitches, make sure that the carried yarn doesn’t get pulled tightly (as you will lose some of the stretch in the hat) or isn’t overly loose and puckered. I like to give the hat a little stretch if I have carried my yarn over a larger expanse to make sure I haven’t pulled it too tight.

DISCLAIMER: This post may contain affiliate links. I receive a small percentage from any purchases you may make (at no cost to you.)
YOU’RE PEACHY KEEN BEANIE (ADULT)
PURCHASE A PRINTABLE/DOWNLOADABLE PDF ON RAVELRY.
MATERIALS NEEDED:
- 5 Colors of Worsted Weight Yarn (approx. 60-75 yds of each) (I used Premier Yarns Everyday in Soft Peach, Coral, Soft White, Peacock, and Glass)
- Size H Hook
- Scissors
- Yarn Needle
- 3″ Faux Fur Pompom
ABBREVIATIONS:
- CH = Chain
- SLst = Slip Stitch
- SC = Single Crochet
- BLO = Back Loops Only
- WS = Waistcoat Stitch
- WS2tog = Waistcoat Stitch Two Together (Insert hook into first WS, pull up a loop, insert hook into next WS, pull up a loop, yarn over and pull through all three loops.)
GAUGE: 14 Waistcoat Stitches x 18 rows = 4″ x 4″
FINISHED SIZE: Approx. 21 1/4″ circumference and 8 1/2″ from top to bottom. This hat is considered an ADULT WOMENS size (according to the Craft Yarn Council’s Head Circumference Chart). I have a 23″ head circumference and this fits me perfect.
HAT BAND
CH 7
Row 1: SC in 2nd CH from hook; SC next 5; CH 1; turn (6)
Row 2-69: SC BLO all; CH 1; turn (6)
Row 70: SC BLO all (6)
With right sides together — bring the two short ends together and SC across
(6 SC); flip the seam to the inside. Leave the yarn attached as you will be using the same color for the foundation row of the waistcoat portion of the hat.
HAT BODY
For the hat body, we will be following the graph. The graph reads right to left and bottom to top. Each box represents one stitch.
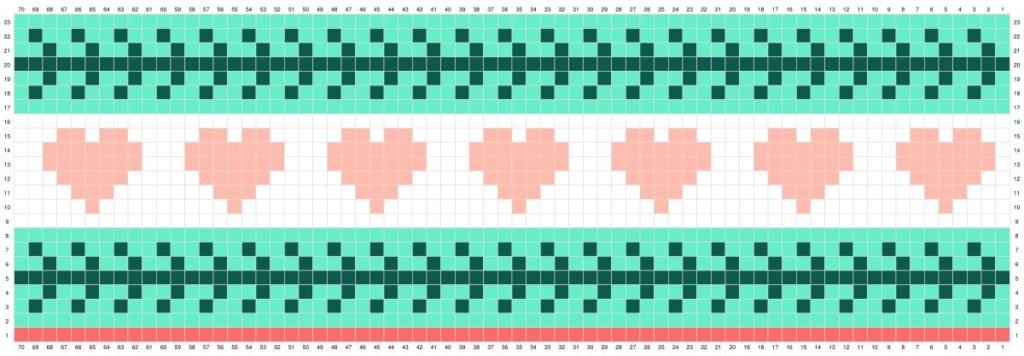
Row 1: For this row, we will be single crocheting around the edge of the hatband. Make sure to keep your stitches loose. These stitches will be the foundation row for your waistcoat stitches. There is space for two stitches between each rib, but we will only be using the first one. The other stitches will be placed in the “V” of each rib.
CH 1; SC 2 before the first rib; [SC rib, SC between ribs], repeat till you have 70 SC. Change to light turquoise on the last stitch; SLst; CH 1 (70)
Now follow the graph to finish the hat body section. See below for special color change instructions.
Notes:
Because we want the row joins to be as seamless as possible, I have made special notes regarding the color changes at the end of certain (not all) rows. Refer to them below.
- Row 1: Change to light turquoise on the last stitch.
- Row 4: Change to dark turquoise on the last stitch.
- Row 8: Change to white on the last stitch.
- Row 16: Change to light turquoise on the last stitch.
- Row 19: Change to dark turquoise on the last stitch.
- Row 23: Change to dark peach on the last stitch.
HAT FINISHING/CLOSING THE HOLE
To finish off the hat and begin closing the hole we will continue doing waistcoat stitches and waistcoat stitch decreases (WS2tog).

Row 24: [WS next 8; WS2tog]; repeat till end; SLst; CH 1 (63)
Note: For rows 25-32, it helps to angle your hook sideways into the WS2tog of the previous row.
Row 25: [WS next 7; WS2tog]; repeat till end; SLst; CH 1 (56)
Row 26: [WS next 6; WS2tog]; repeat till end; SLst; CH 1 (49)
Row 27: [WS next 5; WS2tog]; repeat till end; SLst; CH 1 (42)
Row 28: [WS next 4; WS2tog]; repeat till end; SLst; CH 1 (35)
Row 29: [WS next 3; WS2tog]; repeat till end; SLst; CH 1 (28)
Row 30: [WS 2; WS2tog]; repeat till end; SLst; CH 1 (21)
Row 31: [WS; WS2tog]; repeat till end; SLst; CH 1 (14)
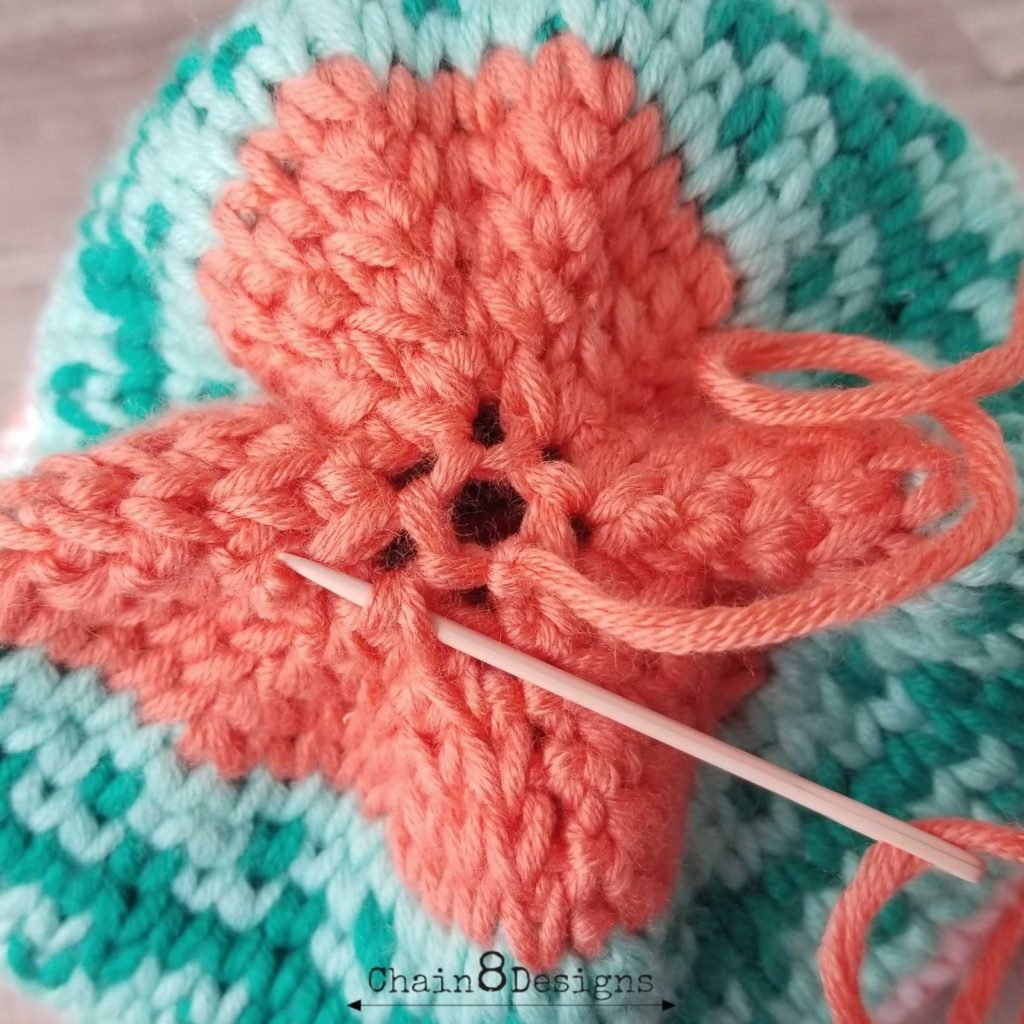
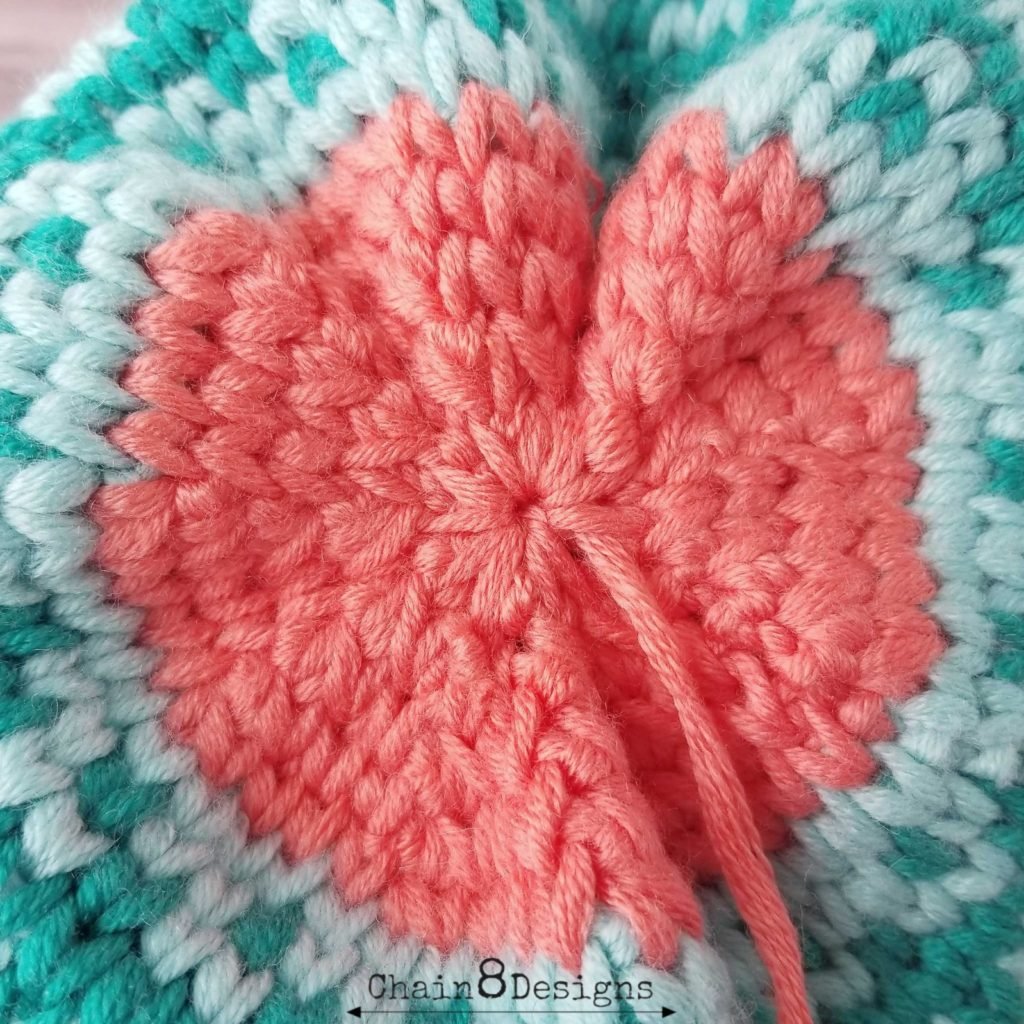
Row 32: WS2tog all; SLst; fasten off [leaving an 18″ tail] (7)
Take your needle and insert through all the WS2tog stitches from the last row (I went around twice), then pull the hole closed. Weave in the ends, attach the pompom and you are done.

I changed the pattern a little after making the red/grey version but wanted you to see the color combo possibilities. This hat would look so cute in a myriad of colors. Let your imagination run wild and come up with your own color combination. As always, I would LOVE to see your versions of this hat. Post on Instagram and use #chain8designs or @chain8designs so I can see them. Till next time…HAPPY HOOKING!

**Feel free to make and sell items that are made from this pattern. Please link back to the pattern on any online sales or include my web address on tags for any in-person sales. Please do not republish or distribute any of the pictures or patterns, in any form, from this site without permission from me. Please e-mail me for any inquiries.**
Add a Comment