While perusing the yarn aisle at Michael’s one day I saw the Caron x Pantone yarn bundles and oohed and aahed over them. I touched their soft texture and ogled the pretty color combinations but had put myself on a self-imposed “yarn diet” so I moved on. The next thing I knew a couple yarn bundles had thrown themselves in my cart. I don’t know how it happened, I looked down and there they were. The poor little things were practically begging me to take them home…I couldn’t say no! I’ve never been good at dieting anyway. LOL!
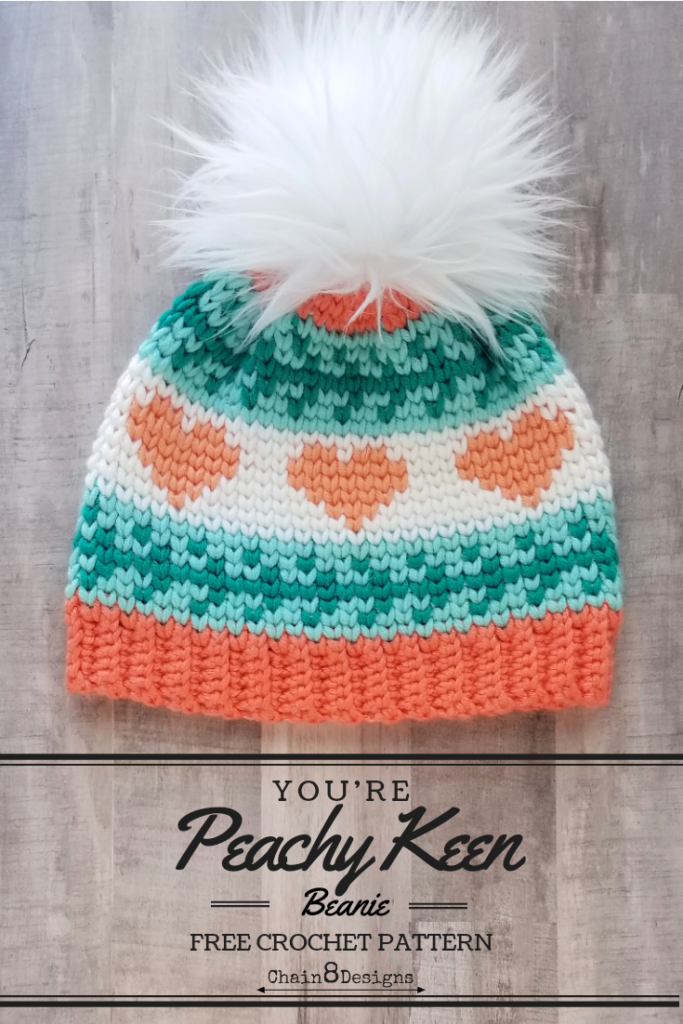
While trying to figure out what to make with my new “adoptees”, I knew that Valentine’s Day was around the corner and I wanted to make my daughter a new hat. I wanted something that was Valentine’s inspired but that she could also wear beyond that. I also wanted to use all the colors in the bundle and didn’t want to use more than the two bundles I had. After some trial and error, I came up with this cute arrow and heart pattern. The finished hat measures approximately 19 1/2″ inches. It fits perfectly on my daughter’s size 20 3/4″ head, with a little room to grow. I made the hat in only the one size but if I have enough inquiries about larger sizes, I might make an adult version.
NOW AVAILABLE IN AN ADULT SIZE HERE!
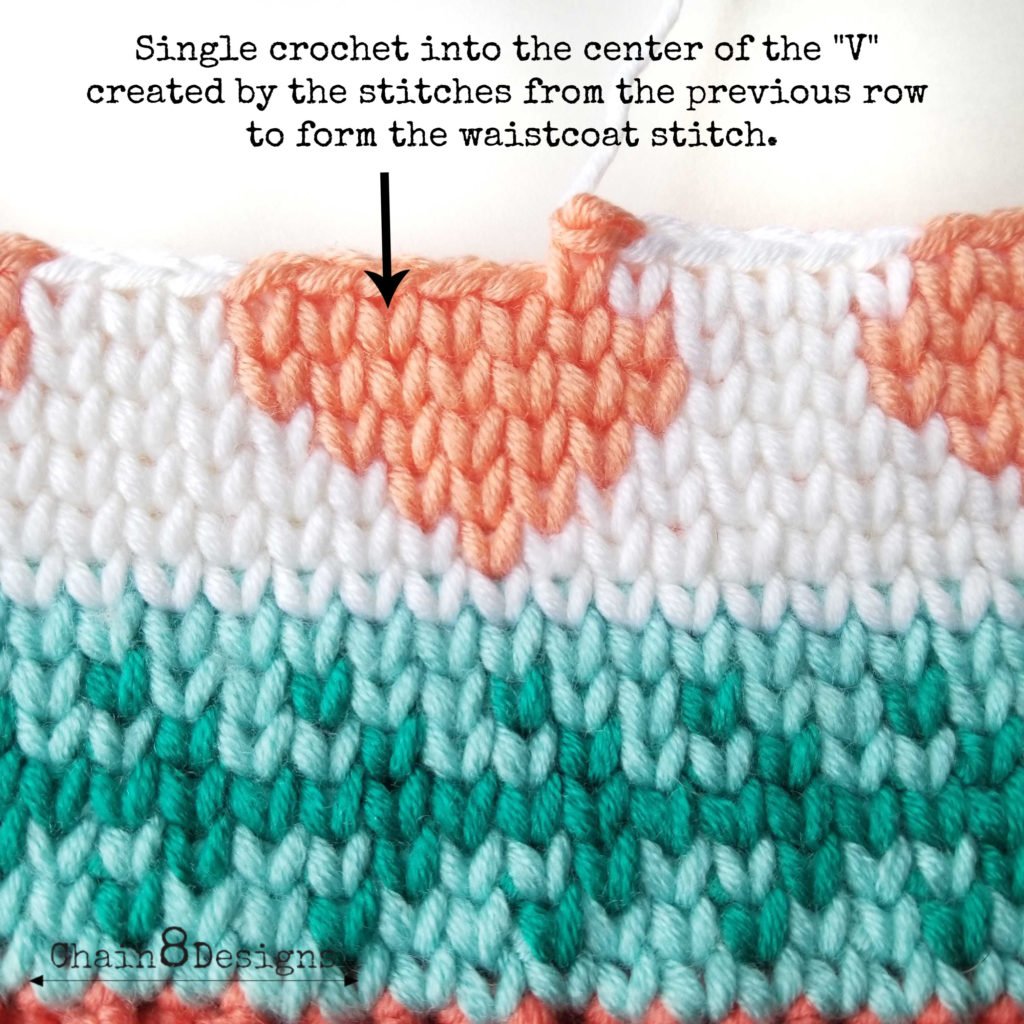
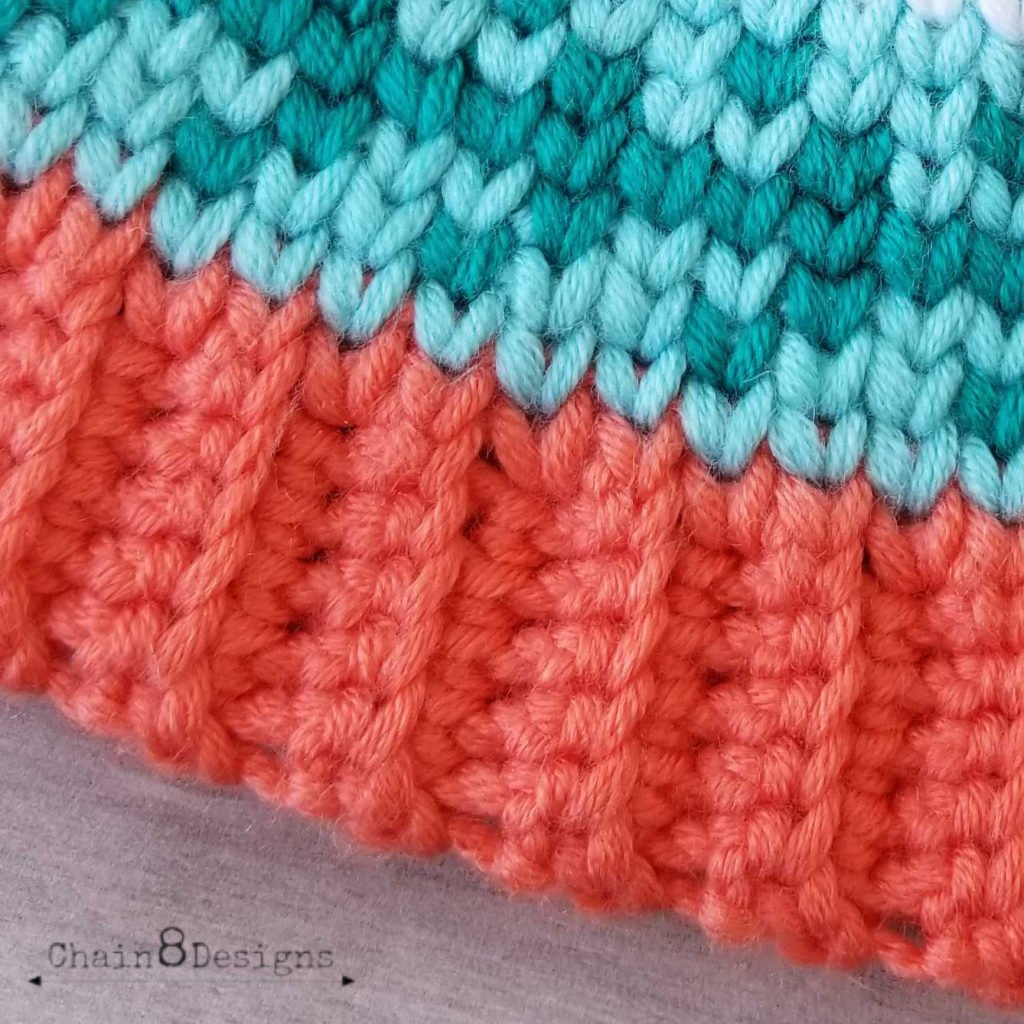
The hat body is made using the waistcoat stitch aka the knit stitch. The stitches are single crochets that are worked into the “V” of the stitches from the previous row. The stitches stack one on top of the other and create a knit-like texture. While it can take a minute to get used to the tension, the stitch is easy and has become one of my absolute favorites for patterned hats.
LOVE FREE PATTERNS? FOLLOW ME ON PINTEREST. I PIN NEW FREE PATTERNS ALMOST DAILY!
WAISTCOAT STITCH
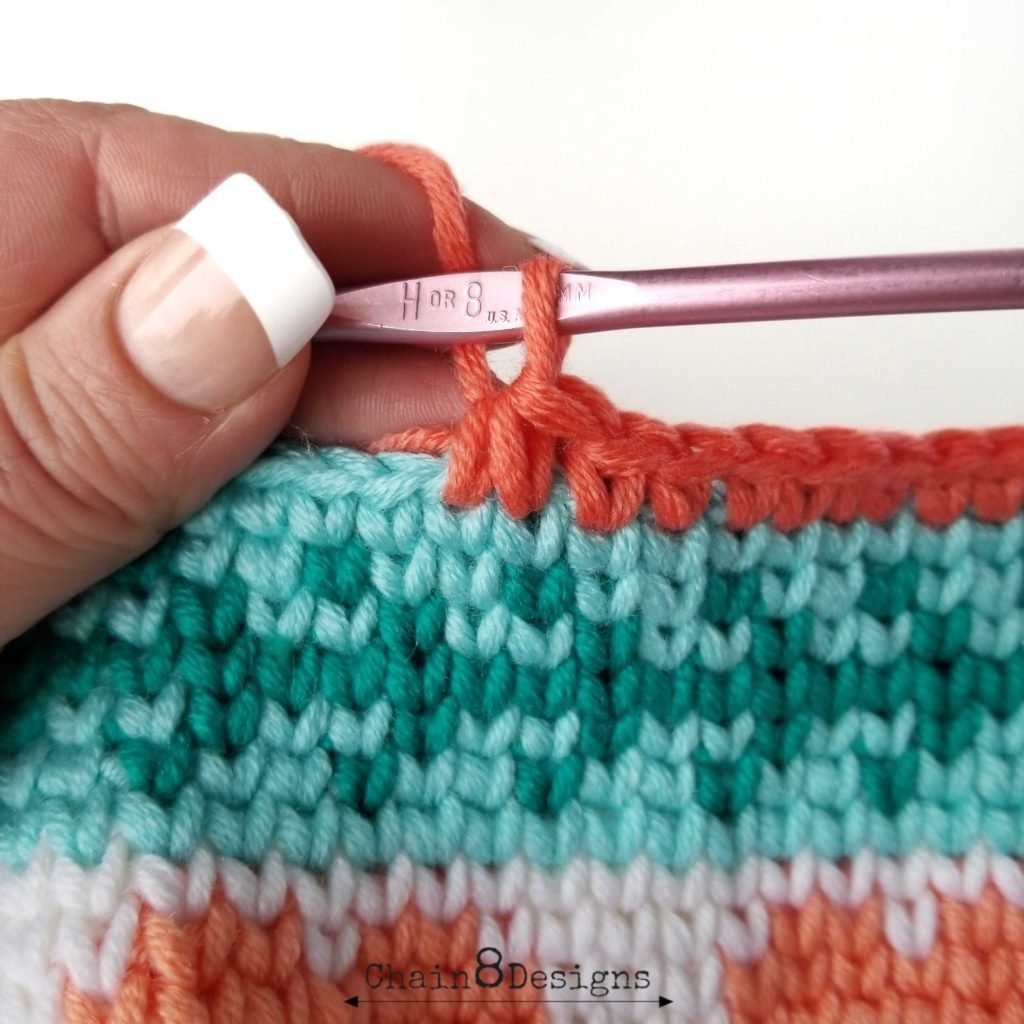
A waistcoat stitch is simply a single crochet that is worked into the “V” created by the previous row and not under the two loops that you would normally. You want to keep your tension loose throughout; your hook should slide easily into the “V”. If you find that you are having to force your hook into the stitch then you are working too tightly. I tend to work on the tighter side, so it took some time to get the tension right.
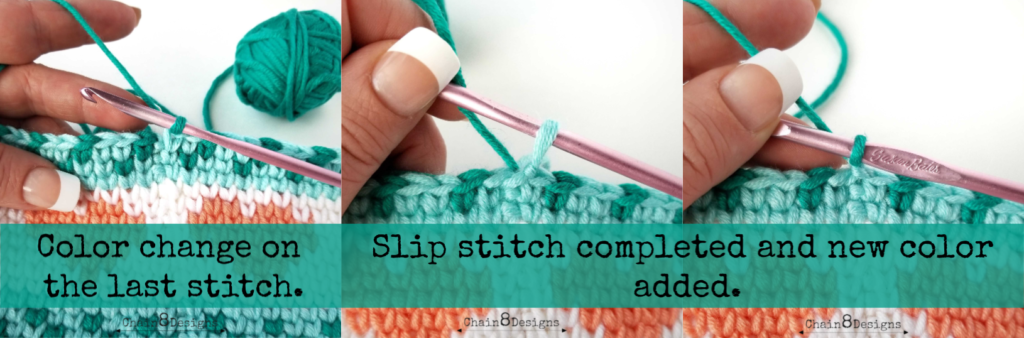
The waistcoat stitch starts with a foundation row of regular single crochets; it is on the second row that you start crocheting into the “V”. To join rows, you slip stitch into the top of the first stitch and then chain 1. Make sure to pull both the slip stitch and chain 1 tightly, this helps conceal the join. Like regular single crochet, you will notice that the stitches will angle to the left. While I have never found this to be a problem, I wanted you to be aware and not worry when you see it. The slant will not throw off the finished look.
For color changes, you will complete those just as you would for regular single crochet. Make sure that your stitches remain a consistent size. I find that sometimes the stitch before a color change gets pulled too tight and looks smaller than the stitches after it. Something to keep an eye out for.
When it comes to carrying the yarn that is not currently being used, I like to crochet over my carries to give the inside of the hat a nice clean look. When carrying the yarn over more than a few stitches, make sure that the carried yarn doesn’t get pulled tightly (as you will lose some of the stretch in the hat) or isn’t overly loose and puckered. I like to give the hat a little stretch if I have carried my yarn over a larger expanse to make sure I haven’t pulled it too tight.

DISCLAIMER: This post may contain affiliate links. I receive a small percentage from any purchases you may make (at no cost to you.)
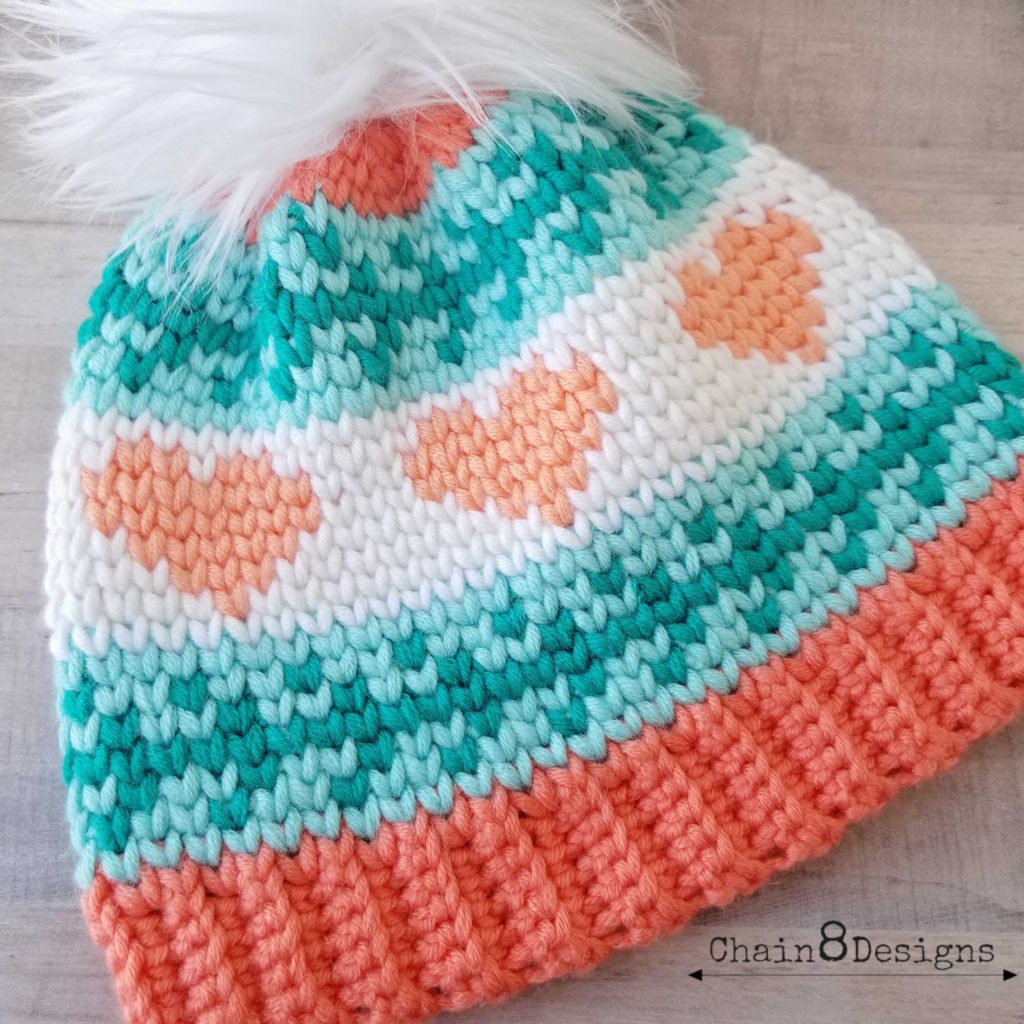
YOU’RE PEACHY KEEN CROCHET BEANIE
PURCHASE A PRINTABLE PDF ON RAVELRY.
MATERIALS NEEDED:
- 2 – Caron x Pantone Yarn Bundle in Lovely Coral
- Size H Hook
- Scissors
- Yarn Needle
- 3″ Faux Fur Pompom
ABBREVIATIONS:
- CH = Chain
- SLst = Slip Stitch
- SC = Single Crochet
- BLO = Back Loops Only
- WS = Waistcoat Stitch
- WS2tog = Waistcoat Stitch Two Together (Insert hook into first WS, pull up a loop, insert hook into next WS, pull up a loop, yarn over and pull through all three loops.)
GAUGE: 14 Waistcoat Stitches x 16 Rows = 4″ x 4″
FINISHED SIZE: 19 1/2″ Circumference and 7 3/4″ from top to bottom. This hat is considered a CHILD size (according to the Craft Yarn Council’s Head Circumference Chart).

HAT BAND
Notes:
- CH does NOT count as a stitch
CH 7
Row 1: SC in 2nd CH from hook; SC next 5; CH 1; turn (6)
Row 2-59: SC BLO all; CH 1; turn (6)
Row 60: SC BLO all (6)
With right sides together — bring the two short ends together and SC across
(6 SC); flip the seam to the inside. Leave the yarn attached as you will be using the same color for the foundation row of the waistcoat portion of the hat.
HAT BODY
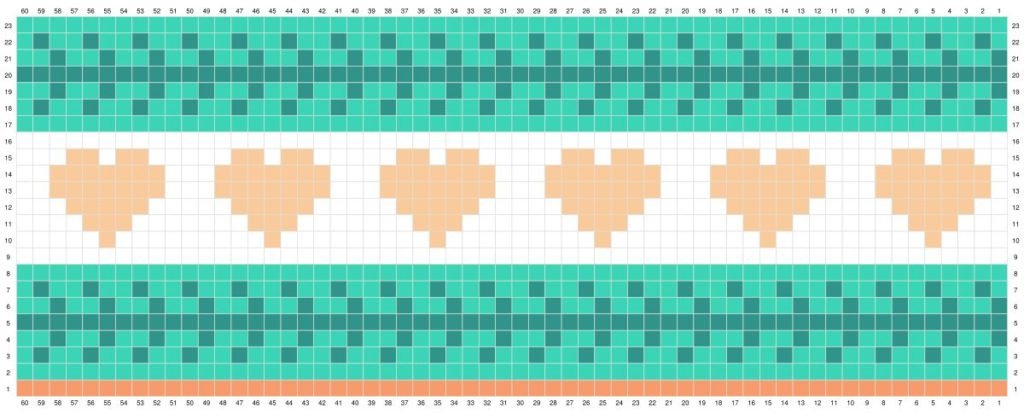
For the hat body, we will be following the graph. The graph reads right to left and bottom to top. Each box represents one stitch.
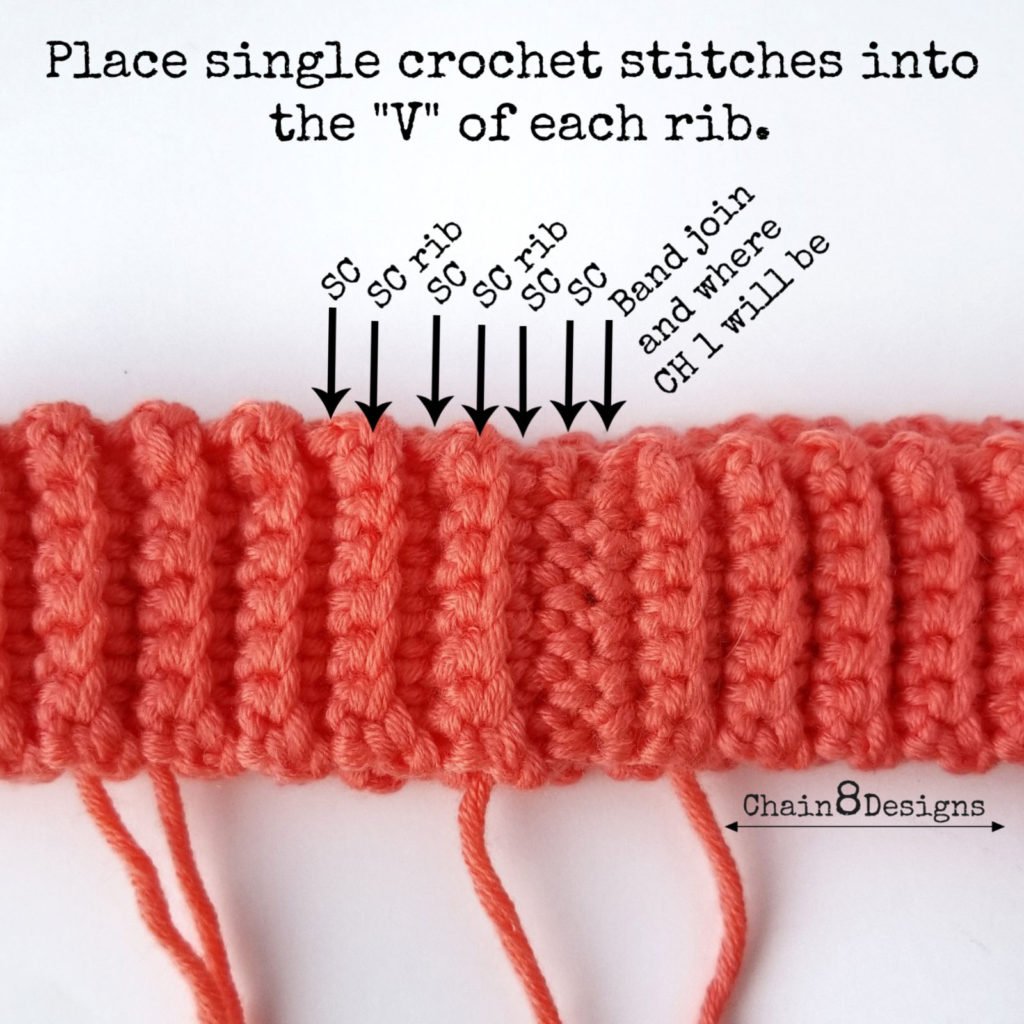
Row 1: For this row, we will be single crocheting around the edge of the hatband. Make sure to keep your stitches loose. These stitches will be the foundation row for your waistcoat stitches. There is space for two stitches between each rib, but we will only be using the first one. The other stitches will be placed in the “V” of each rib.
CH 1; SC 2 before the first rib; [SC rib, SC between ribs], repeat till you have 60 SC. Change to light turquoise on the last stitch; SLst; CH 1 (60)
Now follow the graph to finish the hat body section. See below for special color change instructions.
Note:
Because we want the row joins to be as seamless as possible, I have made special notes regarding the color changes at the end of certain rows. Refer to them below. If there is no note, use the same color as the last stitch to complete your SLst and CH 1.
- Row 3: Change to dark turquoise after slip stitch.
- Row 4: Change to dark turquoise on the last stitch.
- Row 5: Change to light turquoise on the last stitch; complete the SLst and change back to dark turquoise.
- Row 8: Change to white on the last stitch.
- Row 16: Change to light turquoise on the last stitch.
- Row 18: Change to light turquoise on the last stitch; complete the SLst and change back to dark turquoise
- Row 19: Change to dark turquoise on the last stitch.
- Row 20: Change to light turquoise on the last stitch; complete the SLst and change back to dark turquoise
- Row 23: Change to dark coral on the last stitch; SLst; CH 1 and move on to the hat finishing section below.

HAT FINISHING/CLOSING THE HOLE
To finish off the hat and begin closing the hole we will continue doing waistcoat stitches and waistcoat stitch decreases (WS2tog).

Row 24: [WS next 3; WS2tog]; repeat till end; SLst; CH 1 (48)
Note:
- For rows 25-28, it helps to angle your hook sideways into the WS2tog of the previous row.
Row 25: [WS next 2; WS2tog]; repeat till end; SLst; CH 1 (36)
Row 26: [WS; WS2tog]; repeat till end; SLst; CH 1 (24)
Row 27: WS2tog all; SLst; CH 1 (12)
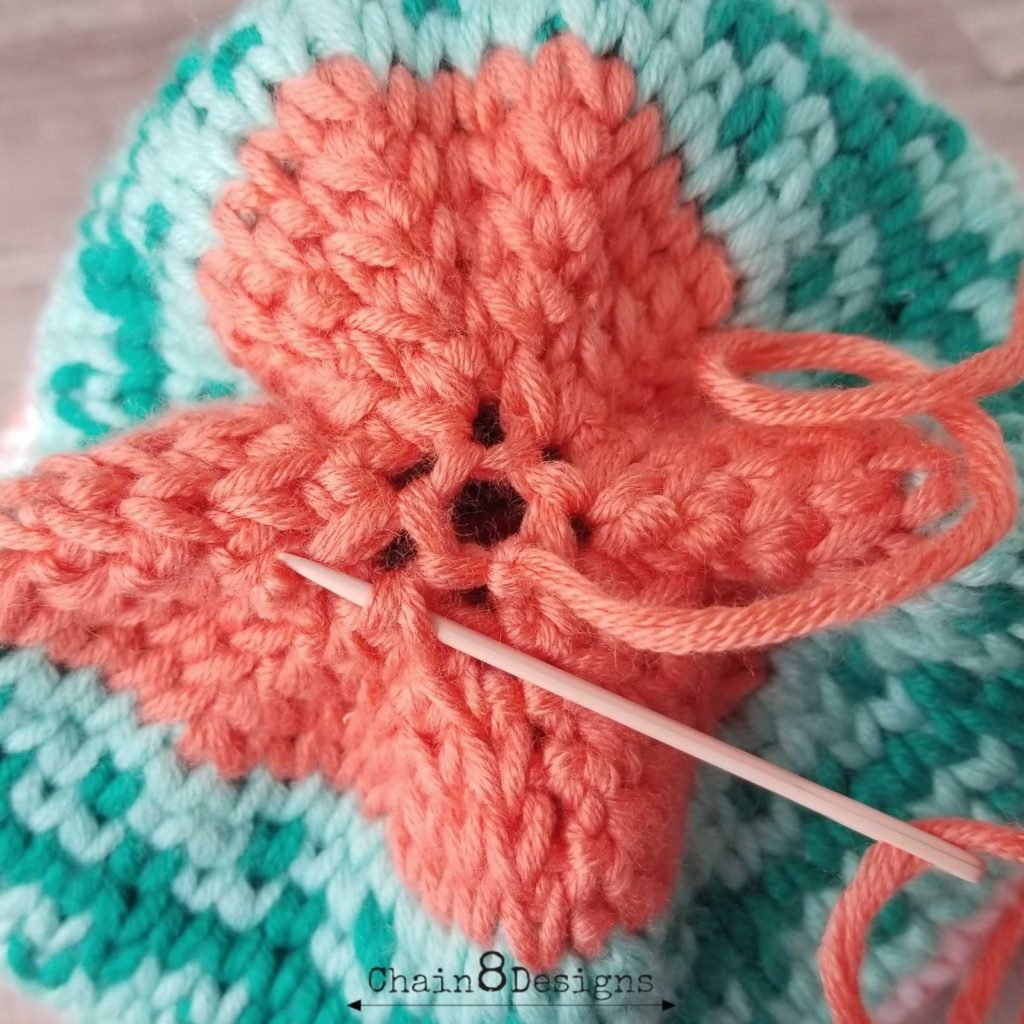
Row 28: WS2tog all; SLst; fasten off [leaving an 18″ tail] (6)
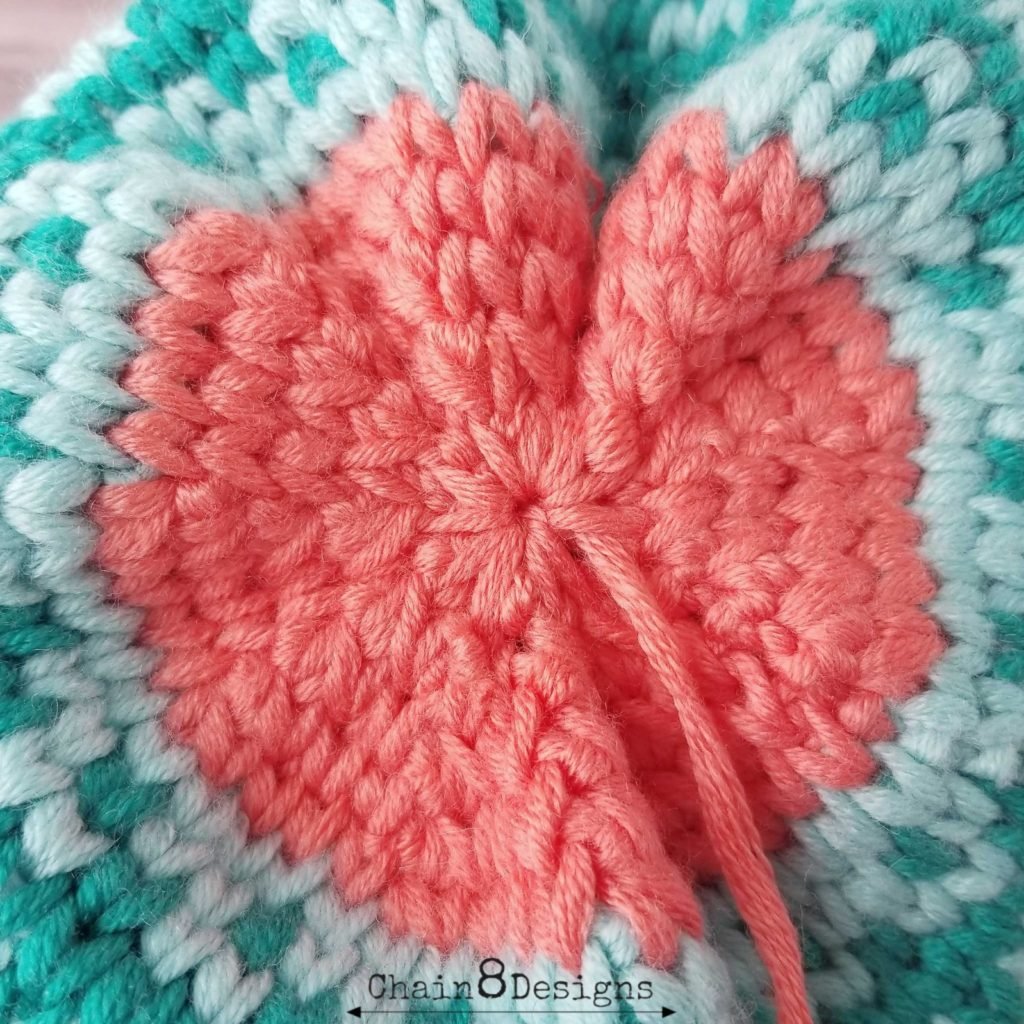
Take your needle and insert through all the WS2tog stitches from the last row (I went around twice), then pull the hole closed. Weave in the ends, attach the pompom and you are done.
I hope that you have enjoyed this pattern and the waistcoat stitch. The stitch lends itself to so many pattern options and has quickly become one of my favorites. If you have any questions, feel free to contact me and I will be happy to help. I would also love to see your versions of this hat. Post pictures of your finished hats on Instagram and use #chain8designs so I can see! Till next time…HAPPY HOOKING!

**Feel free to make and sell items that are made from this pattern. Please link back to the pattern on any online sales or include my web address on tags for any in-person sales. Please do not republish or distribute any of the pictures or patterns, in any form, from this site without permission from me. Please e-mail me for any inquiries.**
I am a left handed crocheter. Would i still use the graph and go left to right instead of right to left?
Thanks
Dawn
Hi Dawn,
I would think that should work. As you can tell I’m a righty, but I don’t see why working left to right wouldn’t work. The only thing that I can see being different is the notes about color changes…you can ignore them. Instead, I would just make sure that the SL st and CH 1 are the same color as the first stitch in the next row. Example: Row 1 – At the end change to light turquoise for the SL st and CH 1. Let me know if you have any more questions. I’m curious to see how things go. If you don’t mind, can you let me know how it comes out?
Have a great weekend,
Jennifer
Yes, it should work. ?
[…] For the child-sized pattern click HERE. […]
I did read the pattern closely enough and only bought one skein of Pantone. ?♀️
*didn’t*
Oh no! Hopefully you’re able to get another. I noticed my Michael’s had then on clarence.
Thank you so much for sharing, I will also be purchasing the pattern from Raverly. Would love to and adult size to make a mommy and me set!!!
*love to have and adult size* lol.
Wonderful pattern, Thank you for offering free, but since it is such a beautiful patter I want to support you so I purchased the pattern on Ravelry. If you ever add to the pattern for other sizes, will you let us know? Thanks
Thank you Donna! I’m actually going to start working on the pattern this weekend. ?
Would LOVE this in an adult size!!! <3