
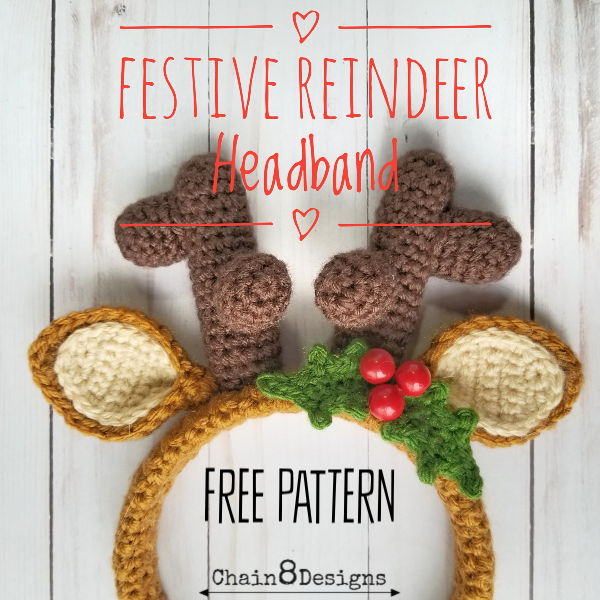
After my daughter loved her Magical Unicorn Headband from earlier this year, I thought it was about time to make her another cute little headband. What better way to mark the start of the Christmas season than with a festive reindeer headband! While I originally made this for her, I think I might make a set for the whole family. I think these would look fabulous in Christmas pictures and would also make great Christmas gifts!
Don’t forget to check out my other holiday headbands!
Christmas Unicorn Headband & Holiday Mouse Headband
FOR SNEAK PEEKS OF UPCOMING PROJECTS FOLLOW ME ON INSTAGRAM.

DISCLAIMER: This post may contain affiliate links. I receive a small percentage from any purchase you may make (at no cost to you).
FESTIVE REINDEER HEADBAND
WOULD YOU LIKE AN EASILY PRINTABLE/DOWNLOADABLE VERSION OF THIS PATTERN? NO ADS OR COMMENTS. YOU CAN PURCHASE A COPY IN MY RAVELRY SHOP.
The downloads help to support this site and make it possible for me to continue to bring you free patterns.
Thank you for your support!
MATERIALS NEEDED:
- Tan Worsted Weight Yarn
- Brown Worsted Weight Yarn
- Cream Worsted Weight Yarn
- Green Worsted Weight Yarn
- Size G Hook
- Size F Hook
- Scissors
- Yarn Needle
- 1″ Plastic Headband
- Glue Gun and Glue
- 3 – 12mm Red Beads
- Poly-fil/Stuffing
- Red Sewing Thread (optional)
- Sewing Needle (optional)
- SC = Single Crochet
- SL st = Slip Stitch
- SCtog = Single Crochet Two Together
- CH = Chain
- SSCF = Seamless Single Crochet Finish


HEADBAND COVER
Notes:
- The chain does NOT count as a stitch.
CH 6
Row 1: SC in 2nd CH from hook; SC 4; CH 1; turn (5)
Row 2-6: SC all; CH 1; turn (5)
Row 7: SC next 2; 2 SC; SC next 2; CH 1; turn (6)
Row 8-10: SC all; CH 1; turn (6)
Row 11: SC next 2; 2 SC; SC next 3; CH 1; turn (7)
Row 12-15: SC all; CH 1; turn (7)
Row 16: SC next 3; 2 SC; SC next 3; CH 1; turn (8)
Row 17-20: SC all; CH 1; turn (8)
Row 21: SC next 4; 2 SC; SC next 3; CH 1; turn (9)
Row 22-25: SC all; CH 1; turn (9)
Row 26: SC next 4; 2 DC; SC next 4; CH 1; turn (10)
Row 27-47: SC all; CH 1; turn (10)
Row 48: SC next 4; SCtog; SC next 4; CH 1; turn (9)
Row 49-52: SC all; CH 1; turn (9)
Row 53: SC next 3; SCtog; SC next 4; CH 1; turn (8)
Row 54-57: SC all; CH 1; turn (8)
Row 58: SC next 3; SCtog; SC next 3; CH 1; turn (7)
Row 59-62: SC all; CH 1; turn (7)
Row 63: SC next 3; SCtog; SC next 2; CH 1; turn (6)
Row 64-66: SC all; CH 1; turn (6)
Row 67: SC next 2; SCtog; SC next 2; CH 1; turn (5)
Row 68-71: SC all; CH 1; turn (5)
Row 72: SC all; fasten off leaving a 3-yard tail (5)
ANTLERS
[With G Hook]Large
(Make 2)
Magic Ring: 6 SC in Magic Ring (6)
Rnd 1: 2 SC in each (12)
Rnd 2-19: SC in each (12)
Rnd 20: SC 11; SL st in last; fasten off, leaving at least a 24″ tail for attaching to the headband cover
Small
(Make 4)
Magic Ring: 6 SC in Magic Ring (6)
Rnd 1: 2 SC in each (12)
Rnd 2-4: SC in each (12)
Rnd 5: SC 11; SL st in last; fasten off, leaving at least a 24″ tail for attaching to the larger antler piece
EARS
Outer (Make 2)
[With G Hook]CH 5
Row 1: SC in 2nd CH; SC next 3; CH 1; turn (4)
Row 2: 2 SC; SC next 2; 2 SC; CH 1; turn (6)
Row 3: SC all; CH 1; turn (6)
Row 4: 2 SC; SC next 4; 2 SC; CH 1; turn (8)
Row 5-8: SC all; CH 1; turn (8)
Row 9: SCtog; SC next 4; SCtog; CH 1; turn (6)
Row 10: SCtog; SC 2; SCtog; CH 1; turn (4)
Row 11: SC all; CH 1; turn (4)
Row 12: SCtog; SCtog; CH 1; turn (2)
Row 13: SCtog (1)
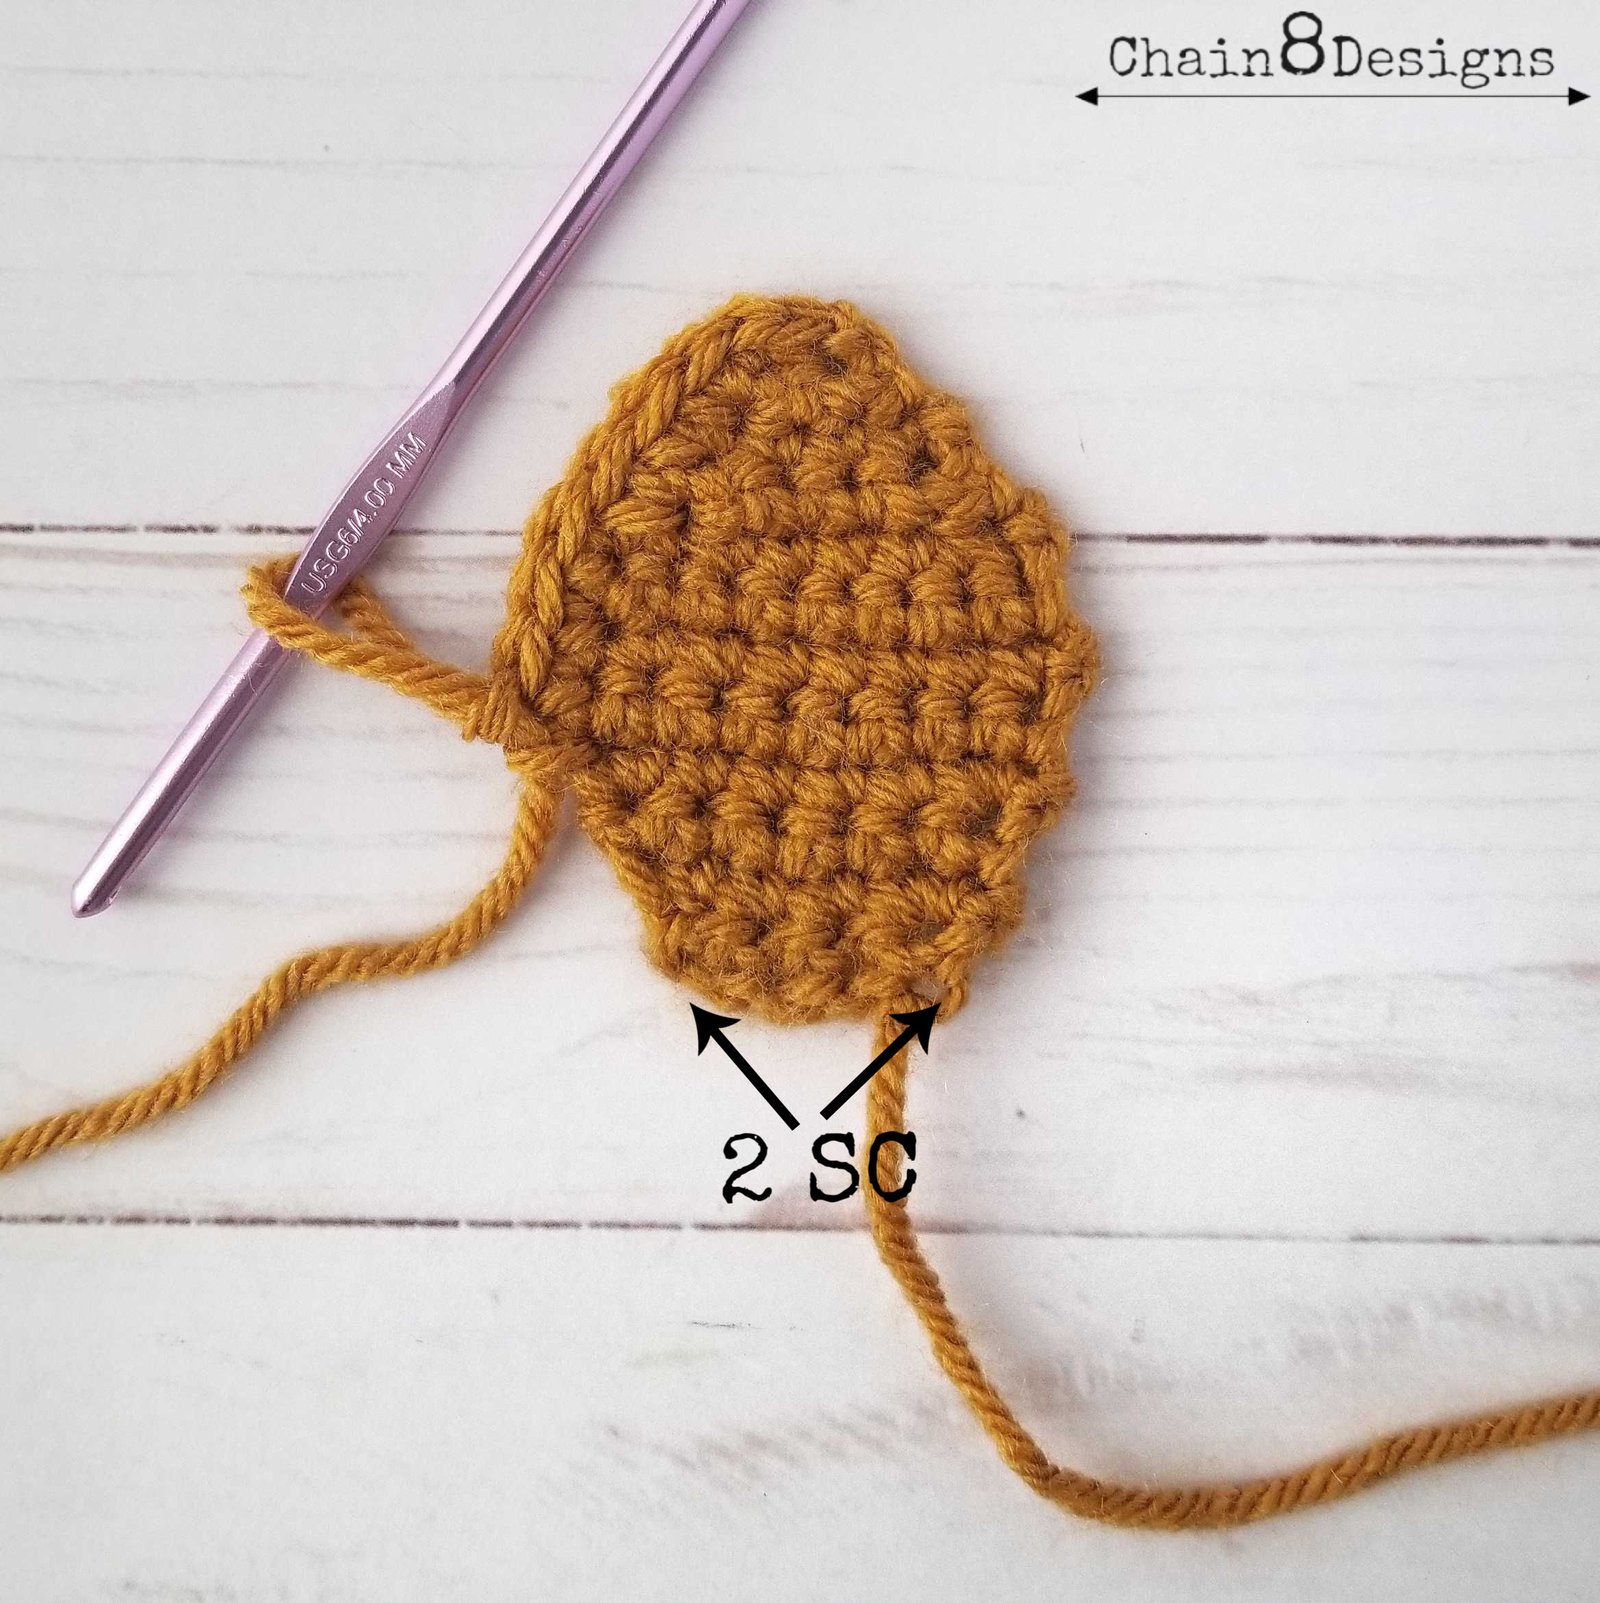
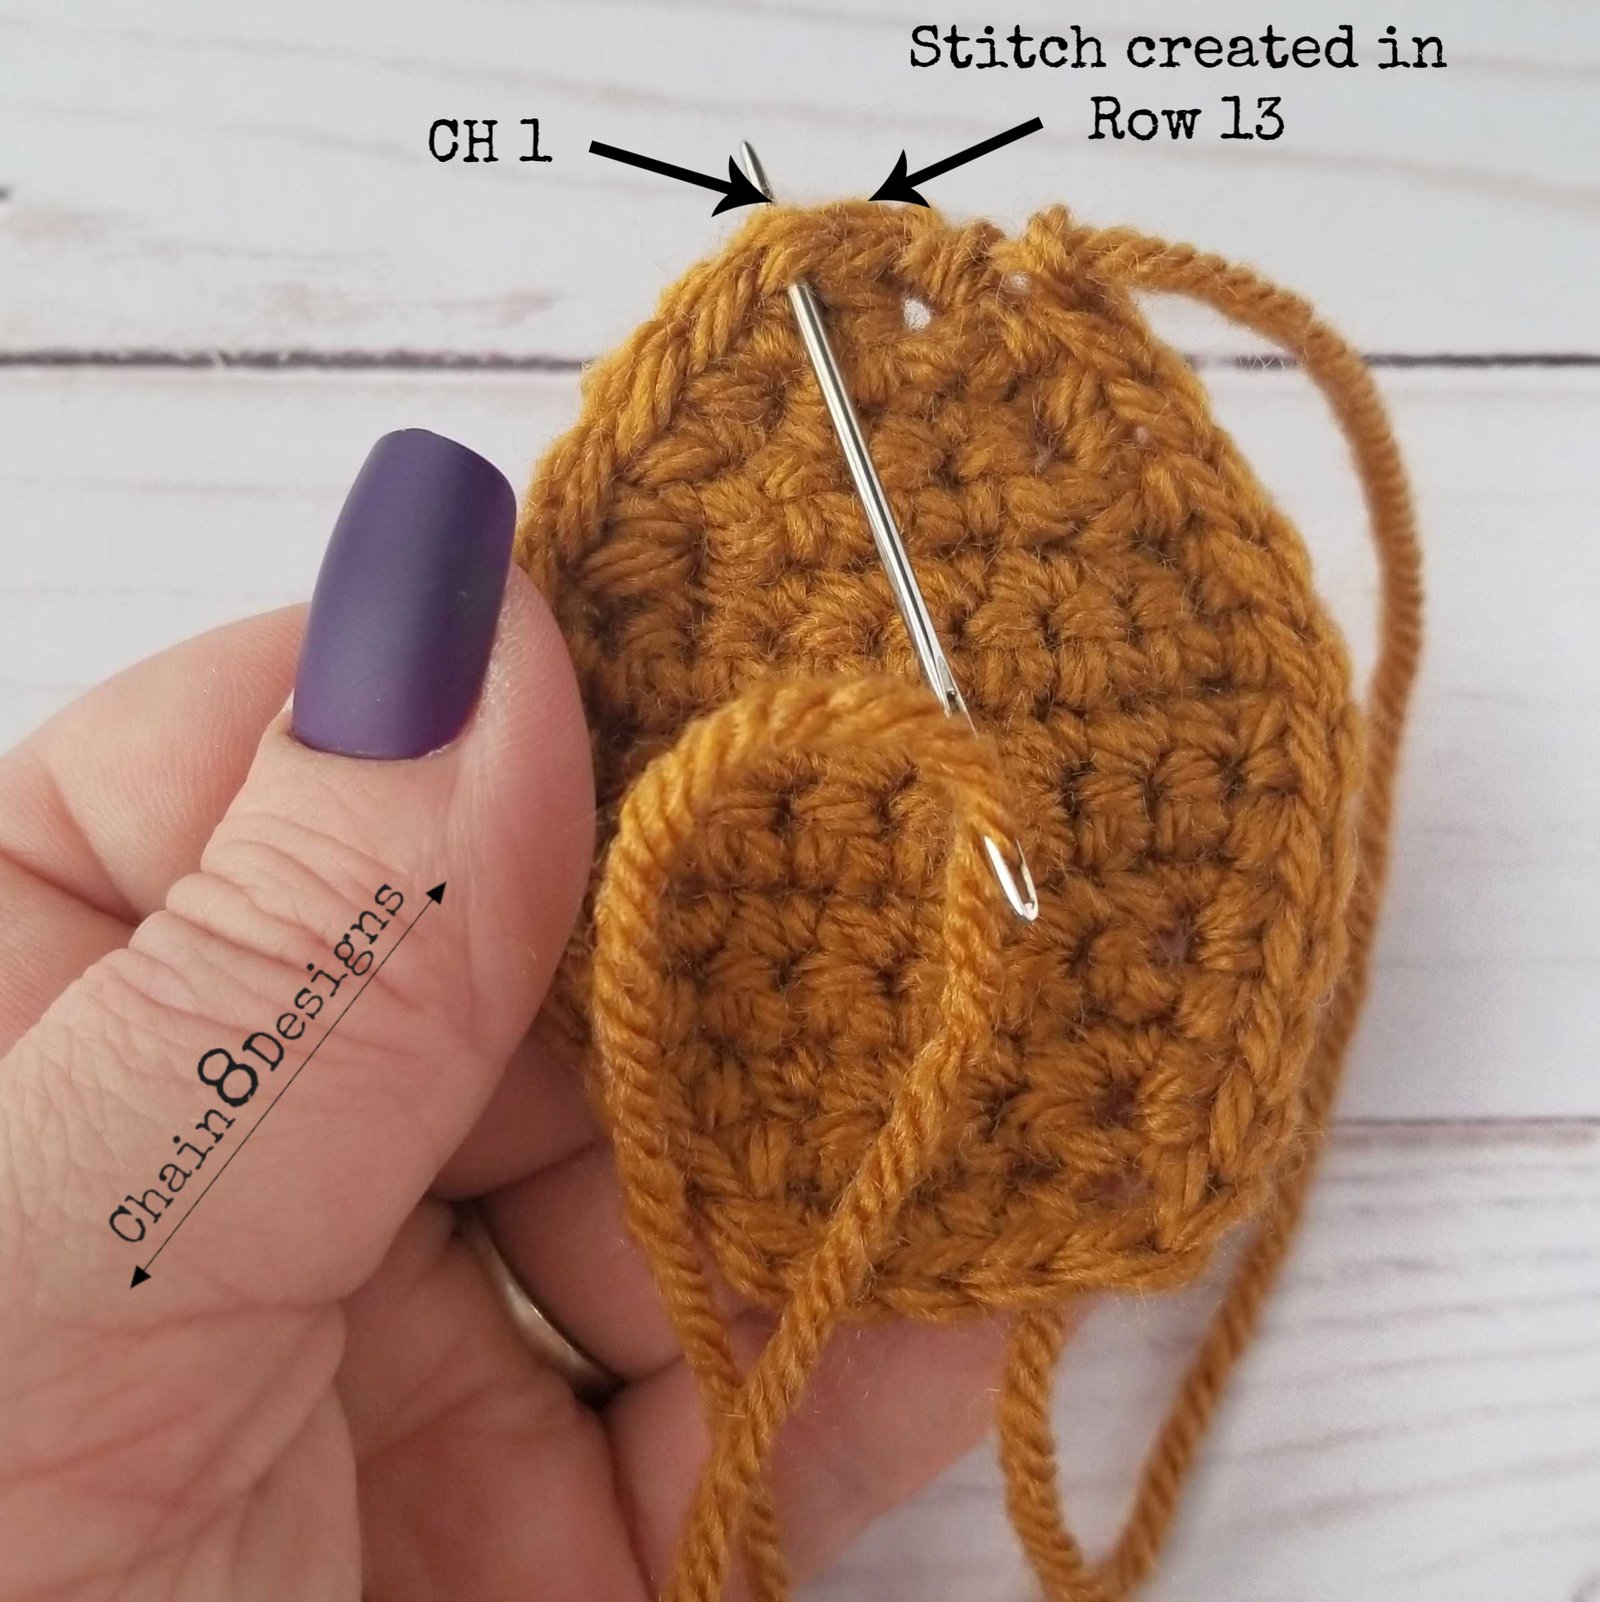
Finishing: CH 1; SC around the edge (placing 2 SC in each bottom corner) stopping at stitch created in Row 13; SSCF to CH 1
Inner (Make 2)
[With F Hook]CH 3
Row 1: SC in 2nd CH; SC; CH 1; turn (2)
Row 2: 2 SC; 2 SC; CH 1; turn (4)
Row 3: 2 SC; SC next 2; 2 SC; CH 1; turn (6)
Row 4-8: SC all; CH 1; turn (6)
Row 9: SCtog; SC next 2; SCtog; CH 1; turn (4)
Row 10: SC all; CH 1; turn (4)
Row 11: SCtog; SCtog; CH 1; turn (2)
Row 12: SCtog (1)
Finishing: CH 1; SC around the edge (DO NOT place 2 SC in each bottom corner – only place 1) stopping at the stitch from previous round; SSCF to CH 1
HOLLY
(Make 2)
[With F Hook]CH 6
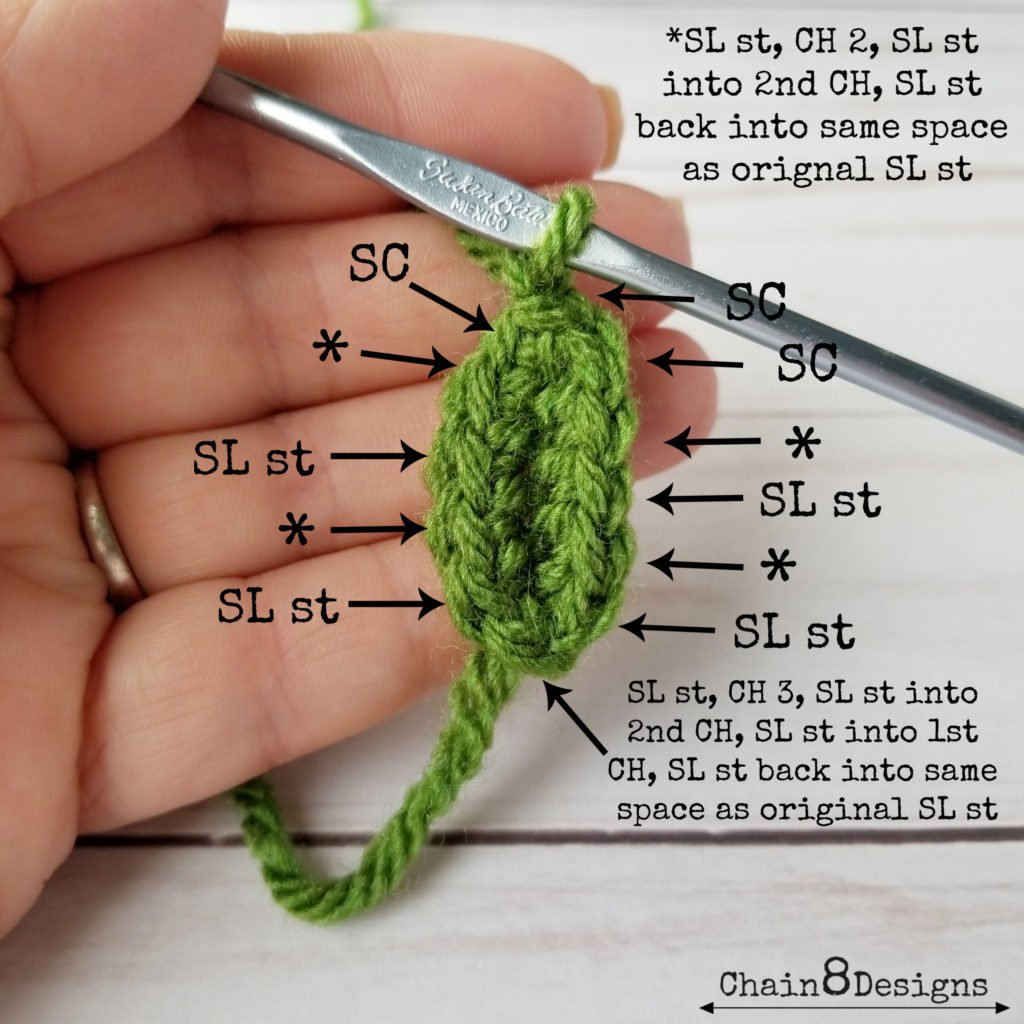
Row 1: SC in 2nd CH from hook; SC next 3; 3 SC in last; (working down the other side) SC next 4; SL st to 1st SC; CH 1
Row 2: SC in CH space; SL st in next; *CH 2; SL st into 2nd CH; SL st back into same space as original SL st*; SL st next 2; repeat from *; SL st next 2; CH 3; SL st in 2nd and 1st CH, SL st back into same space as original SL st; SL st next 2; repeat from *; SL st next 2; repeat from *; SC next 2; SL st to 1st SC; fasten off; weave in ends

ASSEMBLY
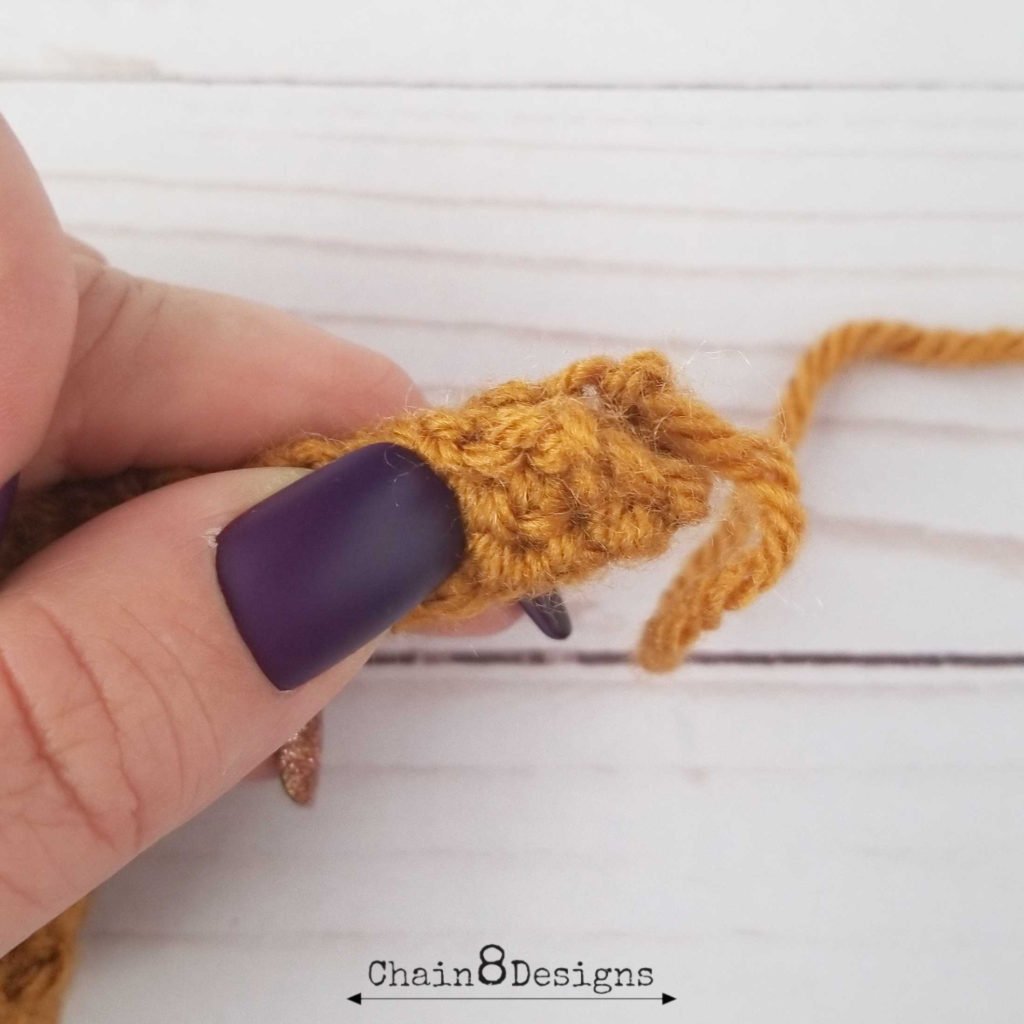
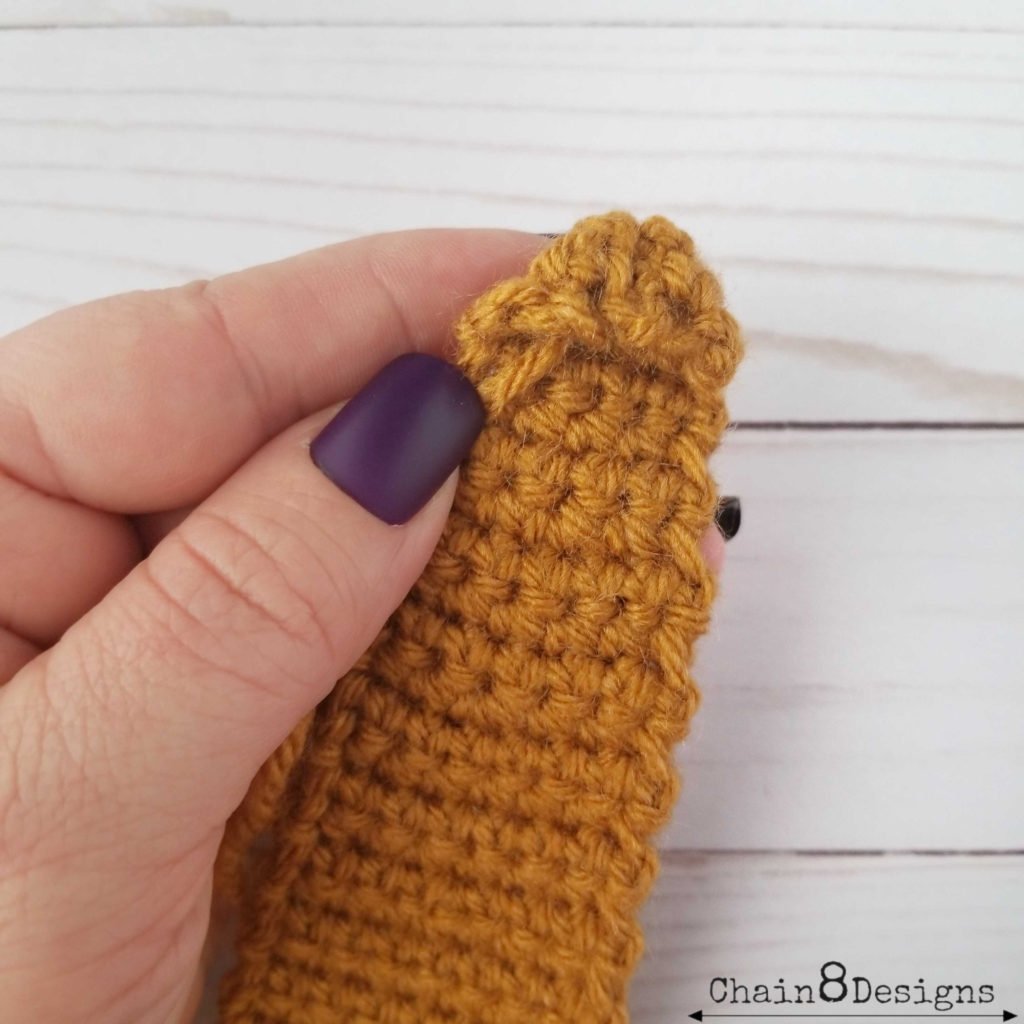
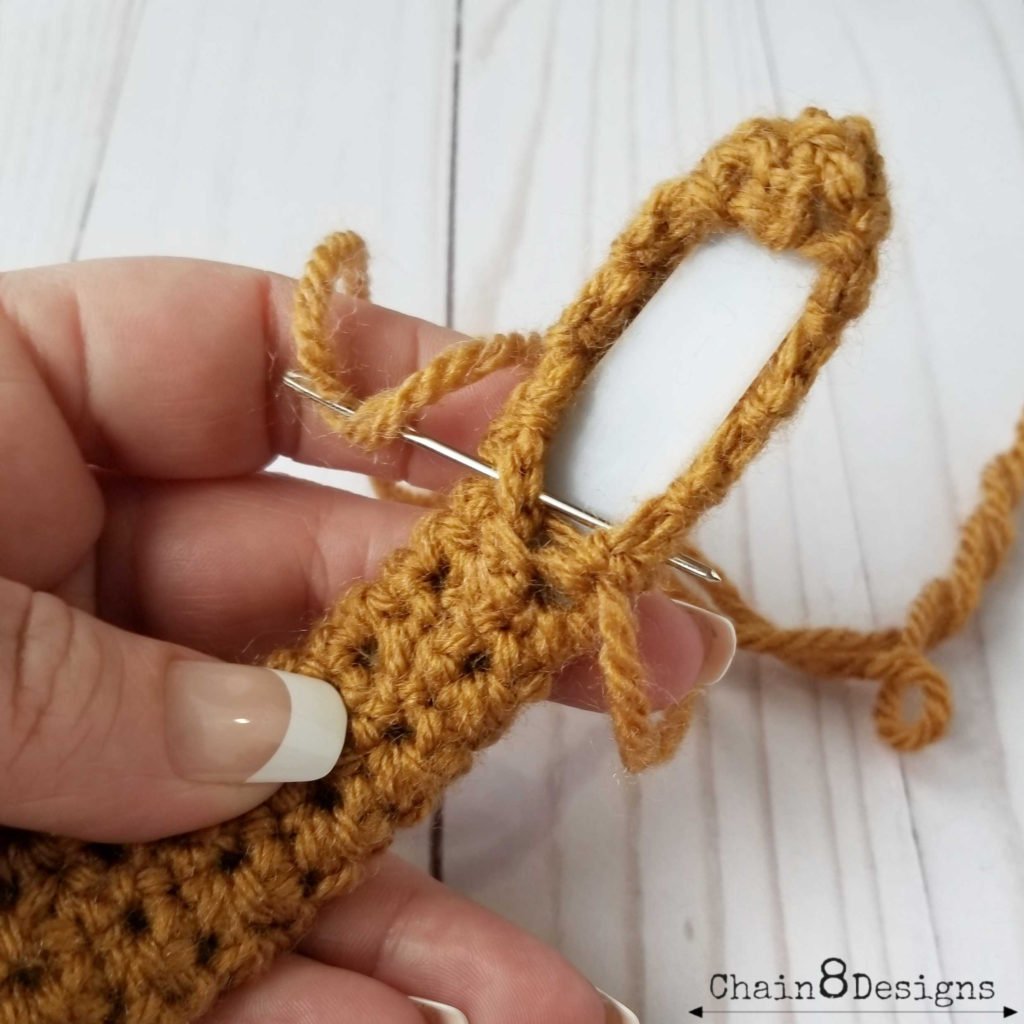
Fold one of the short ends of the headband cover in half and whipstitch the edge to close, repeat on the other end. Flip the seams to the inside. This will create a little pocket that the end of your headband sits in. Place the headband ends in the little pockets then whipstitch the cover together, enclosing the headband; weave in the ends.
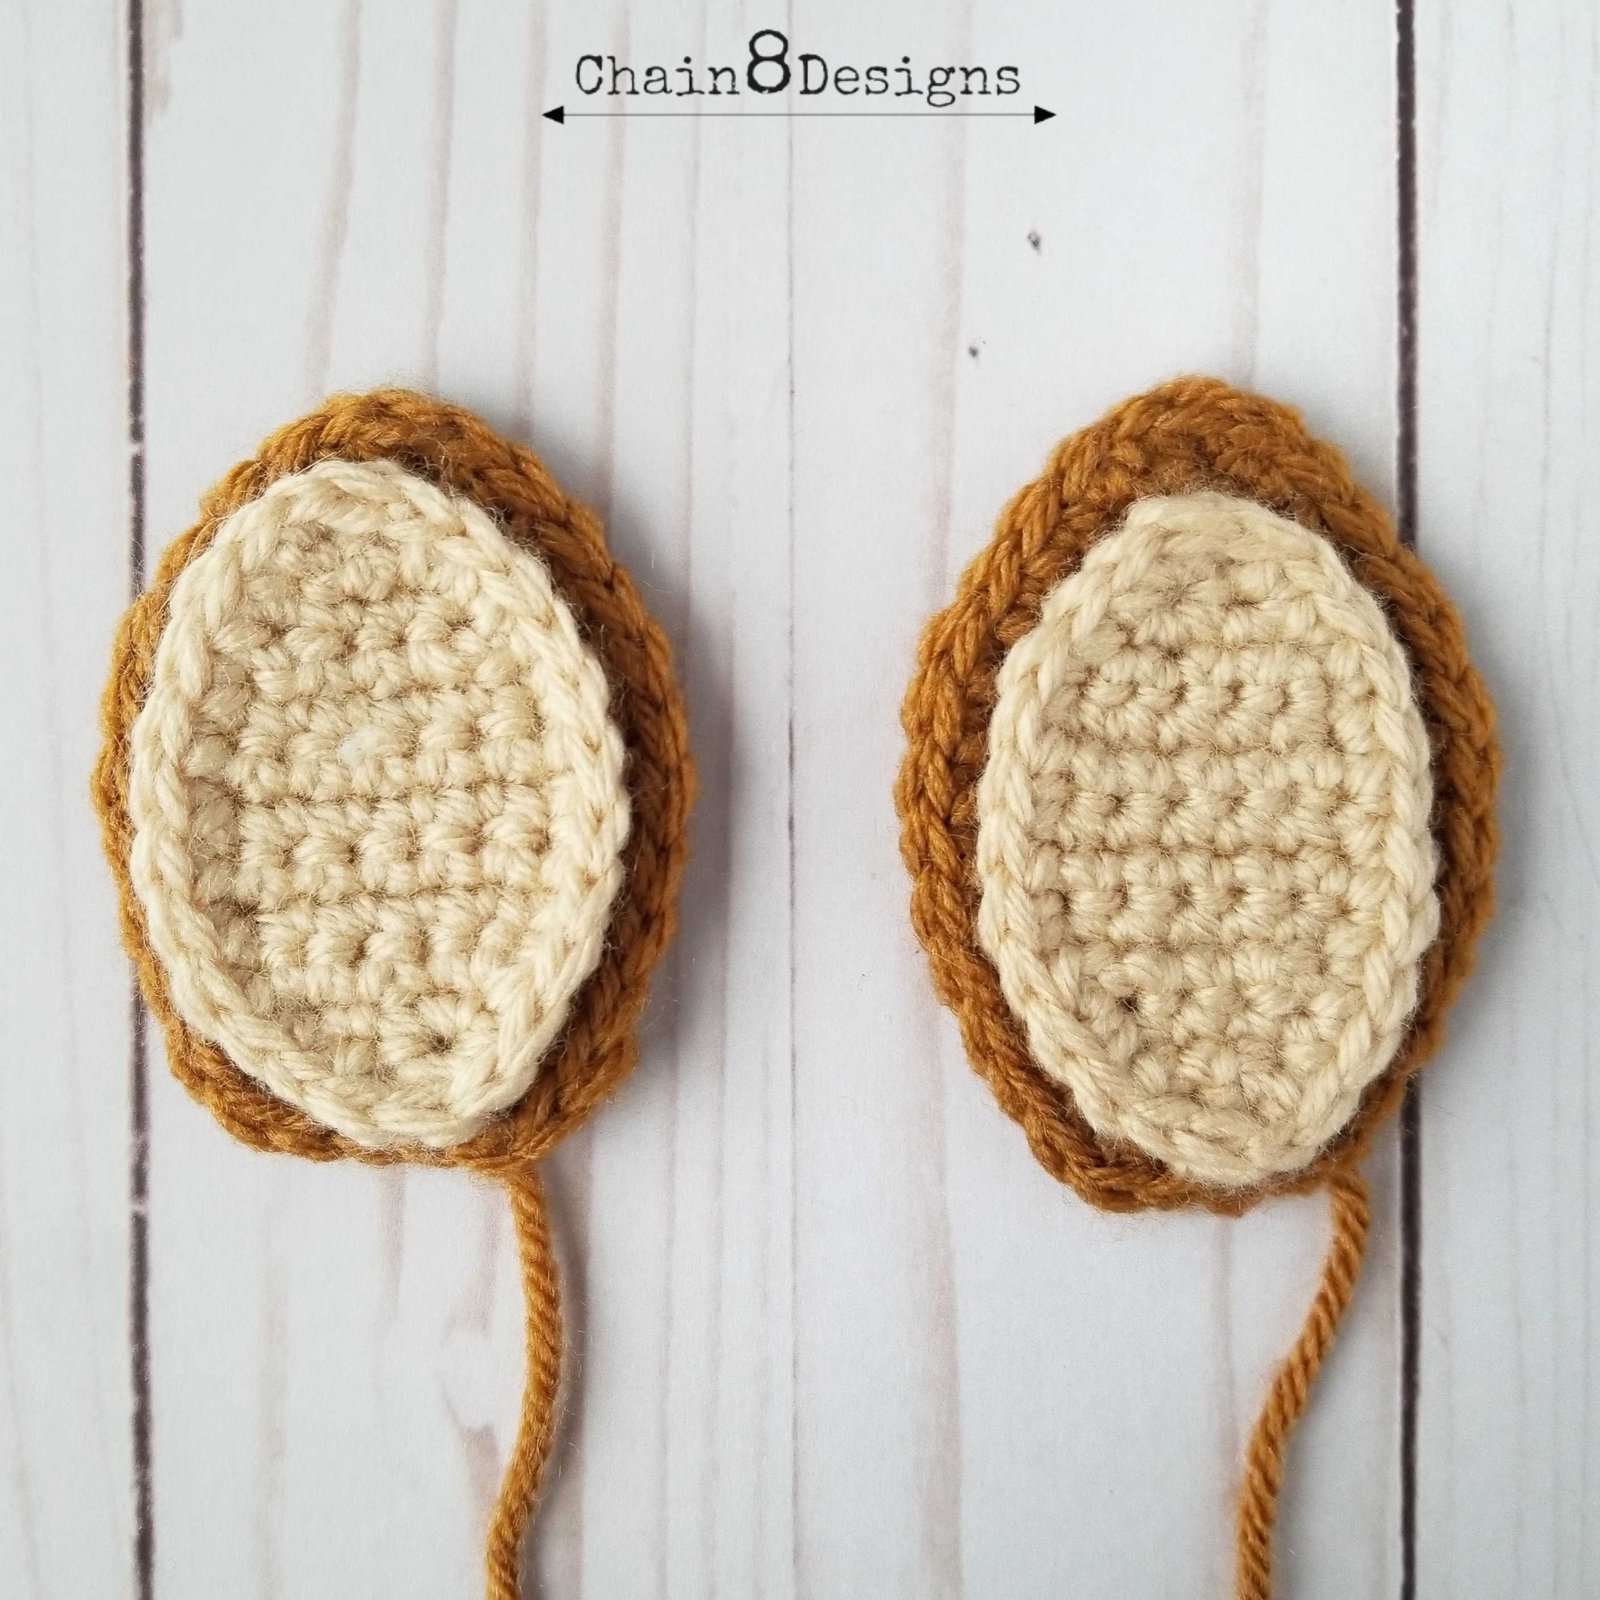
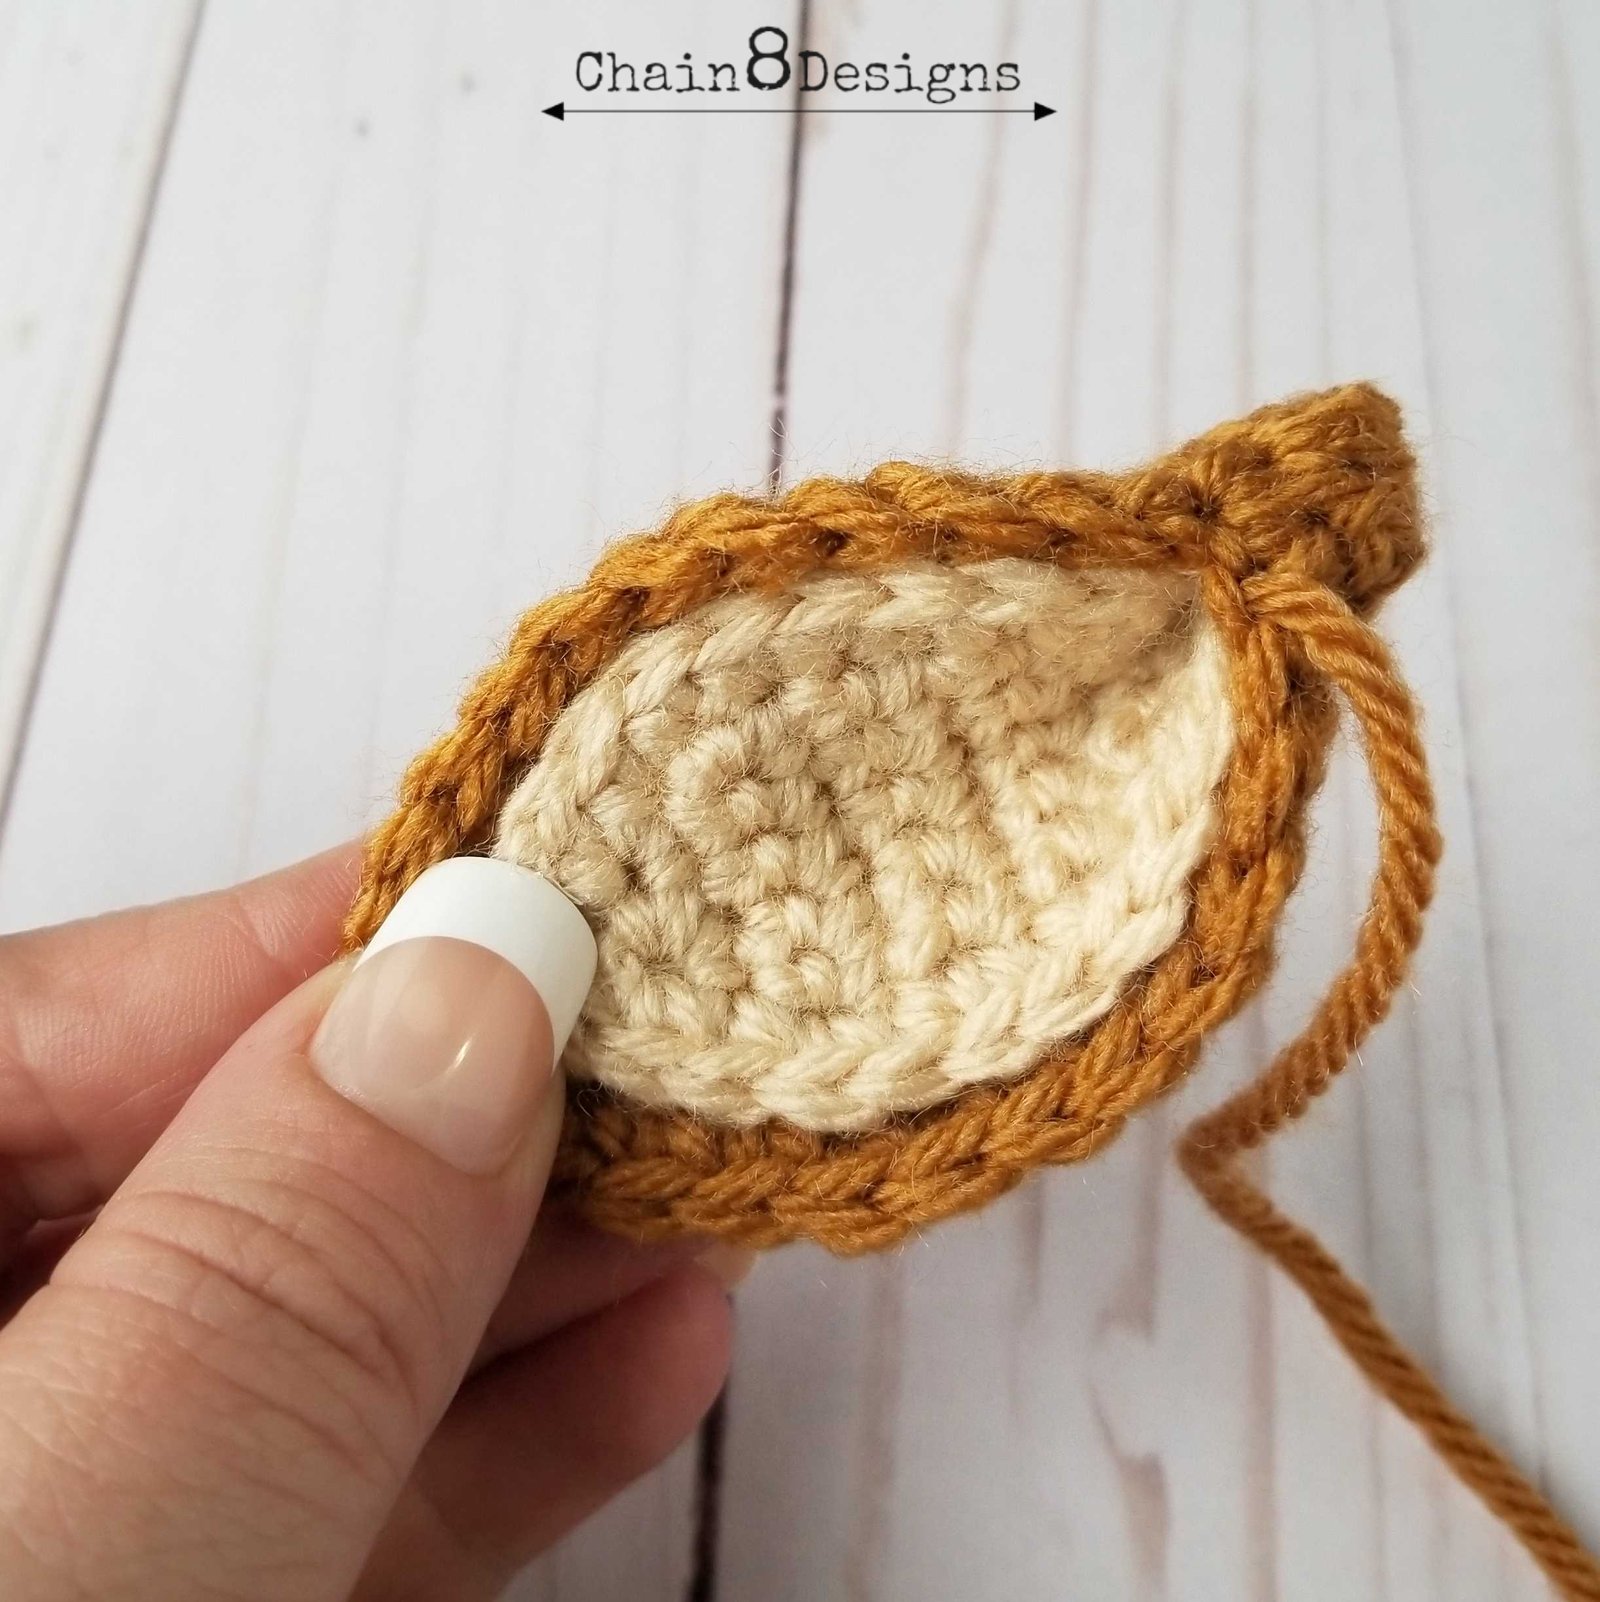
Run a bead of hot glue around the edge of the inner ear and glue to the outer ear (don’t glue the center as it makes the ear too rigid). Fold the bottom edge of the ear together and whipstitch the bottom closed and 3 stitches up the ear, making sure to enclose the inner ear.
Stuff all your antler pieces. Attach the two smaller antlers to the larger antler, one closer to the top and one in the bottom half. I placed the top antler directly on the side and the lower antler more towards the front of the other side.
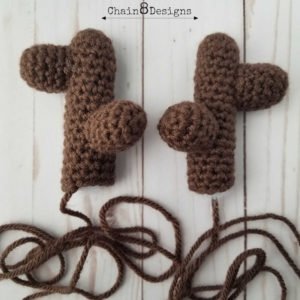
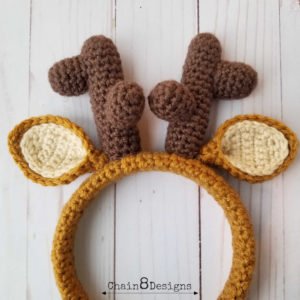
Place a small amount of hot glue in a couple places at the bottom of one of the antlers and place the antler onto the headband, a little to the side of the midpoint of the headband. Make sure that the small antler in on the inside as we need to have enough space to tuck the ears in under the higher small antler. This glue will help hold the placement of the antler as you sew it in place. Sew the antler down and repeat the process with the other antler. Now that the antlers are attached, glue the ears on. Snug the ears up to the base of the antlers.
Glue the holly to the base of one antler/ear then glue the berries on top of the holly. If this is going to be for a young child you will probably want to sew the berries on so there is no chance of them become dislodged and end up in the mouth of a little.


I hope that you guys love this headband as much as my daughter and I do. Don’t be surprised if you see an Instagram picture soon of my whole family wearing one. I would love to see your versions of this headband — post on Instagram and use #chain8design. Till next time…HAPPY HOOKING and HAPPY HOLIDAYS!

**Feel free to make and sell items that are made from this pattern. Please link back to the pattern on any online sales or include my web address on tags for any in-person sales. Please do not republish or distribute any of the pictures or patterns, in any form, from this site without permission from me. Please e-mail me for any inquiries .**





I like it and made it – wish could send you a pic!
Love these . Is there a place to go to print pattern?.
Hi…I’m glad you love it. 🙂 I just added a link (in the pattern) to my Ravelry store where you can purchase the printable/downloadable PDF. Here is also the link so you don’t have to go search for it…RAVELRY STORE
Have a great day,
Jennifer